Skip to content
  • Tech News
  • How to
  • Tips & Tools
  • Tech Reviews
  • VPN
  • Software
Menu
  • Tech News
  • How to
  • Tips & Tools
  • Tech Reviews
  • VPN
  • Software
Search
Close
  • Tech News
  • How to
  • Tips & Tools
  • Tech Reviews
  • VPN
  • Software
Menu
  • Tech News
  • How to
  • Tips & Tools
  • Tech Reviews
  • VPN
  • Software
Search
Close

Home » How to » Solve Windows 10 Cisco IPSec VPN Client Issue

Home » How to » Solve Windows 10 Cisco IPSec VPN Client Issue

How to Solve the Windows 10 Cisco IPSec VPN Client Issue

  • Techninja Pro
  • December 29, 2021
  • 1:19 pm
purevpn banner

Many users have reported encountering “connection subsystem errors” while attempting to use the Cisco VPN client. However, you can resolve this issue by adding one value to your registry.

Installing and using Cisco IPSec VPN Client on Windows 10 works as advertised. This is when all things are good. But, as in most cases, sometimes bad things happen. One of them is the Cisco VPN client not working properly on Windows 10.

In this blog post, TechNinjaPro will show you how to solve the Windows 10 Cisco IPSec VPN software issue.

Before modifying the registry, TechNinjaPro has to warn you of the risks associated with these types of changes.

[QUICK FIX] Windows 10 Cisco IPSec VPN Client Issue

To fix the issue, you should back up your registry and then follow these steps:

  1. Press Windows Key + R and enter regedit, and press OK.

    regedit

  2. When you open the Registry Editor, navigate to HKEY_CURRENT_USERSoftwareMicrosoftWindowsCurrentVersionInternet Setting Key in the left panel.
  3. Right-tick Internet Setting key and select New > Key from the main menu.

    internet settings 1

  4. Enter GlobalUserOffline as the name of the fresh key and pick it.
  5. In the right window, double-tick the DWORD to open the properties.
  6. Enter 1 in the "Value data" field and tick OK to save the changes.

    1 value data

  7. After that, close the Registry Editor and check if the Cisco client is working properly.

Run Cisco AnyConnect Software in Compatibility mode

One of the most important features of Cisco AnyConnect is its ability to work in compatibility mode.

This feature allows you to run Cisco AnyConnect Software in compatibility mode and connect to an older version of the SSL VPN.

Compatibility mode is a feature that allows you to connect to an older version of SSL VPN.

For example, if you have enabled Cisco AnyConnect Compatibility Mode on your Windows 10 computer, then any new version of SSL VPN will be connected with Windows 7 or Windows 8 operating systems.

Similarly, suppose you have enabled Cisco AnyConnect Compatibility Mode on your Mac OS X laptop or desktop computer.

In that case, any new version of SSL VPN will be connected with Mac OS X 10.10 Yosemite operating system or earlier versions of Mac operating systems.

To do so, you need to follow these simple steps:

  1. Find the Cisco AnyConnect Software shortcut, right-tick it, and select Properties.
  2. Go to the Compatibility tab.
  3. Check Run this software in compatibility mode and choose an older version of Windows 10.

    Run this program in compatibility mode

  4. Tick Apply to fix the issue.

After turning on Compatibility mode, the problem with Cisco AnyConnect Software will be resolved.

Related: PureVPN Windows: How to Setup VPN on Windows 10?

Delete WAN Miniport (IP), WAN Miniport (IPv6) and WAN Miniport (PPTP) Devices

WAN Miniport IP, IPv6, and PPTP devices are used by the network adapter driver to communicate with the DHCP server and receive data packets and send data packets over a dial-up connection. 

If you have multiple network adapters installed on your computer, each one will have its own set of WAN Miniport devices.

For example: Certain devices, such as WAN Miniport, can interfere with Windows VPN and cause a variety of issues.

Some clients have reported the ‘A connection to the remote PC couldn’t be set up’ error message when attempting to use a VPN on Windows 10.

Erasing all WAN Miniport gadgets are one of the proposed methods to overcome this problem. 

To do that, follow these steps:

  1. Press Windows Key + X to open the Windows menu. Select Device Manager from the list.

    device-manager

  2. When you open Device Manager, navigate to View > Show hidden devices.

    show hidden devices

  3. Find all WAN Miniport devices and delete them.
  4. After deleting all WAN Miniport devices, your VPN connection should start working without any issues. 

Install Cisco VPN Client Properly

Cisco VPN Client is a software that allows you to connect to the Cisco Virtual Private Network service. This client has been designed to work with Windows 10, Windows 7, Windows 8 and Windows 8.1.

The Cisco VPN Client can be downloaded from the Cisco or Microsoft websites. Once you have downloaded it, it is important to install it properly so that you can use it without any problems.

Users have reported getting a Cisco VPN client error during the installation, and one technique to solve this issue is installing the device properly. 

To do so, download the latest Cisco VPN client and follow these steps:

  1. Download DNE programming from Cisco. Make a point to download the 32-bit or 64-bit form, so it coordinates your working framework.
  2. Install the DNE programming.
  3. In the end, introduce Cisco VPN.

Use Microsoft CHAP Version 2

Microsoft CHAP Version 2 is the standard Remote Desktop Services (RDS) authentication method. It’s used in both RD Gateway and RD Web Access.

Microsoft CHAP Version 2 is supported in Windows Server 2008 and later operating systems, as well as Windows 7 and Windows 8 client computers.

However, it’s not supported on earlier versions of Windows Server or previous versions of Windows.

Note: If you're using RD Gateway with a host operating system that doesn't support Microsoft CHAP Version 2, use plain text authentication instead.

If you allow specific protocols through your virtual private network, you can solve some errors.

Users have reported fixing the VPN connection issue by following the steps below.

  1. Find your VPN connection and right-tick on it.
  2. Select Properties from the main menu.

When the properties window starts, go to the Security tab, allow these protocols and check Microsoft CHAP Version 2. 

After enabling Microsoft CHAP Version 2, your virtual private network should start working without issues.

Related: 11 Fixes for the “No Internet Secured” Error on Windows 10

Diagnose and Disable Your Internet Connection

You can solve issues with VPN by detecting your connection.

To do so, follow these steps:

  1. Press Windows Key + X and choose Network Connections from the main menu.
  2. When the Network Connections window opens, find your VPN connection. Right-click on it and select identify from the menu.If the issue still persists, right-tick the VPN connection and select Disable.

    diagnose connection

  3. Wait for the scan to finish.
  4. If the issue still persists, right-tick the VPN connection and select Disable.

    disable connection

  5. Wait for some time and enable your VPN connection by following the same steps.

This is an easy solution for a problem that many users have reported successfully solving.

Uninstall Citrix DNE Updater

Citrix DNE Updater is a program that allows you to update the DNE Updater for Citrix XenApp and XenDesktop.

Using the Cisco IPSec VPN client, you can solve various errors by uninstalling Citrix DNE Updater.

After uninstalling this device, download and introduce SonicWall VPN 64-bit software from Dell. The problem with VPN should now be totally resolved.

Check if your Time is Correct

Time is important to everyone. While using SoftEther VPN, users reported Error Code 1 and the quickest way to fix this issue is to check your time.

To do this, follow these steps:

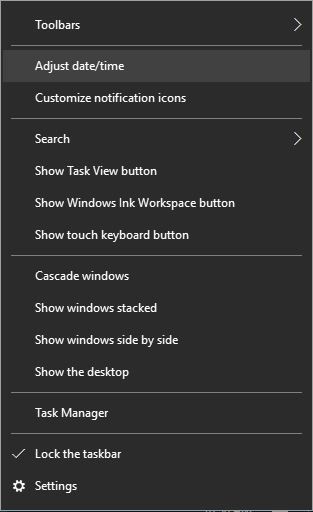
  1. Right Click on your clock and select adjust date/time.

    adjust date-and-time

  2. Stop the Set time automatically option and turn it back on.

    set time automatically

  3. After doing so, your click should be correct, and the VPN error will be resolved.

Use Command Prompt

When you are trying to install Cisco VPN software and get a message saying that the Cisco VPN software driver is not installed, there is a simple solution. You only need to use Command Prompt and follow a few steps.

To do so, follow these steps.

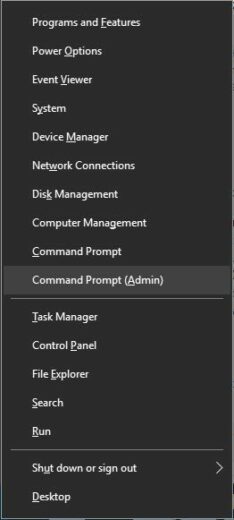
  1. Press Window Key + X and choose Command Prompt.

    command prompt

  2. When Command Prompt opens, enter the below-mentioned commands:

    net stop CryptSvcesentutl /p%systemroot%System64catroot2{F750E6C3-38EE-11D1-85E5-00C04FC295EE}catdb

  3. When asked, be confident to choose OK to attempt the repair.
  4. After the repair is done, leave Command Prompt and restart your computers. 

Reinstall Your VPN Client

If you’re using a third-party VPN program (NordVPN) and are experiencing errors, you may be able to fix the problem by reinstalling the software.

Users reported that they solved numerous issues by simply reinstalling their VPN, so it’s worth a try. Remember that this applies to all third-party VPN tools.

Avail Discounts on NordVPN

Related: How to Set Up your own Windows 10 Built-in VPN?

Best VPNs for Windows 10

NordVPN

Best VPN for Beginners

Get NordVPN Read Full Review

SurfsharkVPN

Best VPN with Excellent Speeds

Get Surfshark Read Full Review

ExpressVPN

Best VPN with powerful Unblocking Ability

Get ExpressVPN Read Full Review

Frequently Asked Questions

Is the Cisco VPN client compatible with Windows 10?
The Cisco VPN client does not work in Windows 10, which should not be surprising given that it was discontinued in 2011. In fact, you'd be lucky if it works on your Windows 8.1, as Cisco has previously said that Windows 7 was the final supported operating system for their VPN client.
Why isn't Cisco VPN working?
Restart the computer and reinstall the VPN client, making sure there isn't any antivirus or personal firewall installed or operating on the computer while completing the process. The VPN client should now be fully installed and working.
How to reset a Cisco AnyConnect service?
  1. By hitting the Win + S keys simultaneously or selecting the Cortana symbol, you may launch a Windows search.
  2. Type services into the search.
  3. Locate and choose Cisco AnyConnect Secure Mobility Agent from the list of services.
  4. Click the Start the service link on the left.
  5. Restart the Cisco AnyConnect VPN client.

Conclusion

A virtual private network is crucial if you want to ensure your security on the internet.

However, various errors with VPN clients can happen. If you encounter any VPN errors, please feel free to comment below so that TechNinjaPro will help you out!

We Can Also Help With .

Be the first to read about the recent tech news, reviews, and problem-solving DIYs by Signing Up with us Today!

Join our Newsletter .

Be the first to read about the recent tech news, reviews, and problem-solving DIYs by Signing Up with us Today!

VPNs for You!

Best Free VPNs for Android In 2022 | Keep Your Mobile Data Private, Secure, And Anonymous

June 30, 2022

How Can You Watch USA DirecTV While Not Being In The USA? | Complete VPN Guide

June 29, 2022

Best VPNs To Unblock WhatsApp In UAE | Unblock WhatsApp Calling In UAE

June 29, 2022

Avast Secureline VPN License Key 2022 [Free Activation Code]

June 24, 2022

Table of Contents

Latest Articles for You!

Best Free VPNs for Android In 2022 | Keep Your Mobile Data Private, Secure, And Anonymous

June 30, 2022

How Can You Watch USA DirecTV While Not Being In The USA? | Complete VPN Guide

June 29, 2022

Best VPNs To Unblock WhatsApp In UAE | Unblock WhatsApp Calling In UAE

June 29, 2022
popular categories.
VPNs
Software
Reviews
Tips & Tools
Tech News
Categories .
  • VPN
  • Software
  • Tech Reviews
  • DIYs(Tips and Tools)
  • Latest News
VPN (Cyber Security) .
  • Best VPNs
  • iOS VPN
  • Android VPN
  • Windows VPN
  • Mac VPN
  • Streaming VPN
  • Budget VPN
Software .
  • IObit (Windows PC)
  • AOMEI (Windows PC)
  • Mackeeper
  • Antivirus
  • Sales and Marketing
About us .
  • Contact us
  • About us

© 2022 techninjapro.com - All Rights Reserved

Facebook Twitter Instagram Pinterest Linkedin