It is a typical problem among windows users that their laptop starts to slow down. It is sometimes due to high CPU utilization. You can check if it’s due to interfering software in the task manager.
You may notice that the service host Windows Image Acquisition uses a lot of CPU on Windows 10, similar to WMI Provider Host using a lot of CPU.
When WIA uses a lot of CPU, disc space, or RAM, you may get a black screen or a death screen afterwards.
But if you do not know What Windows Image Acquisition is on Windows 10 and how to stop it from using a high CPU, you will get answers to all these questions in this article.
What is Windows Image Acquisition?
Windows Image Acquisition is designed for communication between the operating system and graphics hardware. It offers scanning and camera image capture services.
If something goes wrong with the WIA process, It can result in significant disc and CPU utilization in Windows 10 computers, causing the system to slow down. TechNinjaPro has listed a few solutions for this problem. Follow them to get rid of it.
How to Fix Windows Image Acquisition High CPU Usage?
The issue may be caused by a hardware or driver malfunction. If you’re having trouble with the WIA procedure on your Windows PC, try one of these solutions to fix it:
1. Restart WIA Service
The first and foremost thing to restart the Windows Image Acquisition Service. By simply doing this, the issue with high CPU may be resolved.
So follow the procedure given below:
- To launch the Run window, use the Win + R keys on your keyboard.

- Then, type services.msc and hit Enter.
- Locate the Windows Image Acquisition Service in the Service Manager.
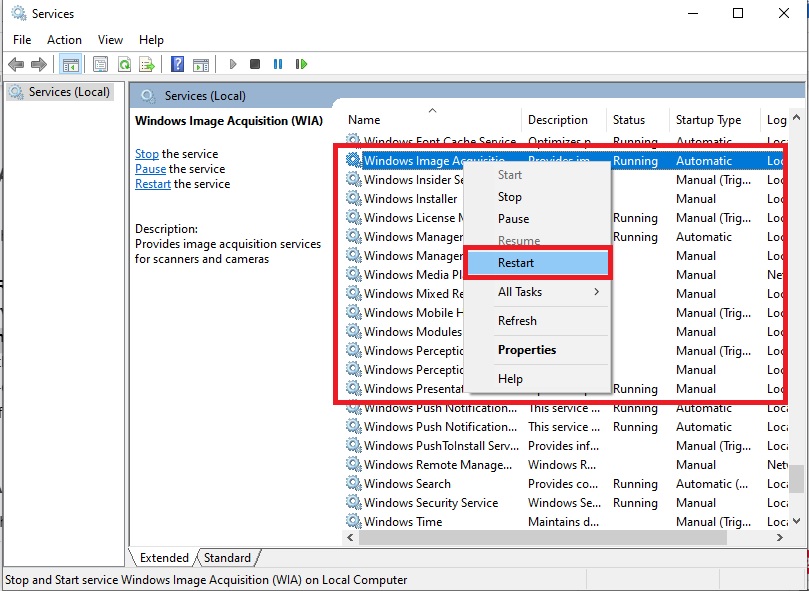
- Right-click on the service Status and choose to Start if it is blank. If the service status is Running, right-click it and choose Restart.
- Check to see if this solves the problem.
2. Check WIA CPU Automatically
Other than restarting the Windows Image Acquisition service, it is appropriate and vital to monitor the amount of CPU consumed by WIA in real-time.
Advanced SystemCare allows you to monitor the activities of WIA and inform you which app causes the high CPU, disc, and RAM utilizing Windows Image Acquisition. As a result, you can quit the program to free up additional CPU.
Follow the steps to get started with Advanced SystemCare:
- Get Advanced SystemCare, install it, and run it.
- You may notice the program’s icon on the right bottom of your Desktop shortly after you activate it.
- Open Performance Monitor by right-clicking the Advance SystemCare application icon.
- Click the right arrow symbol on the Desktop to maximize Performance Monitor.
- Select CPU in Performance Monitor, then click the Speed up icon.
Turning off associated apps or services, such as Windows Image Acquisition will free up additional CPU resources. (Read complete Review of Advanced SystemCare PRO)
3. Repair system files
High CPU could be caused because of your system’s corrupt and faulty files. You need to remove them from the computer immediately, but if you do not want to remove them or cannot locate them.
TechNinjaPro has a solution for that as well. Windows has a built-in feature called Repair System Files. It will help you find and solve any issues with the files.
Follow the steps to run Repair System File using Command Prompt:
- Type Command Prompt in the Start menu. Select Run as administrator.

- Press Enter after typing the following command:
| SFC /scannow. |

After running the command, Restart the computer to let the changes affect.
4. Disable SuperFetch & Background Intelligent Transfer Service
Services like Superfetch and Background Intelligent Transfer Service are believed to cause Service host Windows Image Acquisition to use a lot of CPU on Windows 10.
So you might as well try stopping them for a time and then re-enabling them to see whether they function.
Follow the steps given below to disable Background Intelligent Transfer Service:
- To open the Run box, press Windows + R, and type services.msc in the box. Finally, click OK.

- In the Services pane, locate the Background Intelligent Transfer Service and right-click it to see its properties.
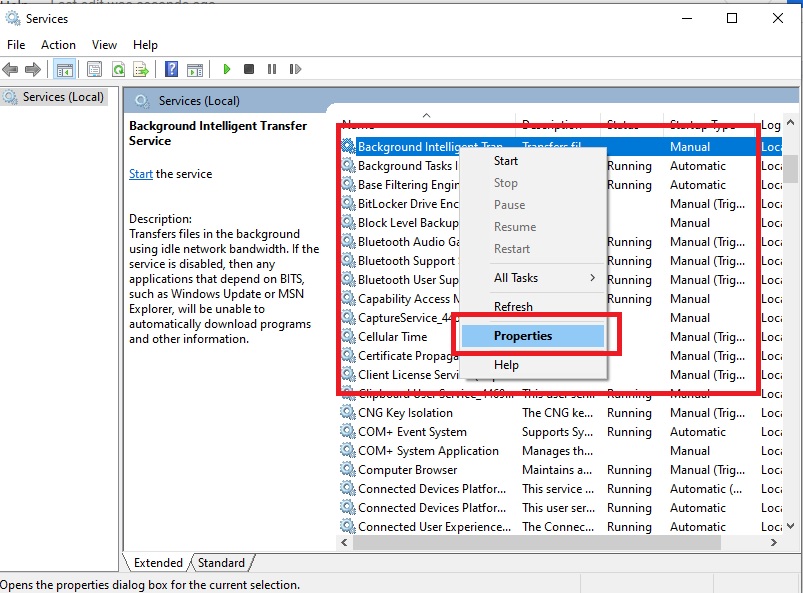
- Select Disabled in the Startup type section of the General page.
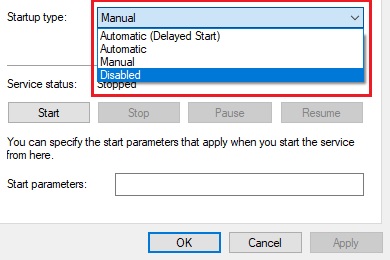
You may later right-click it to Re-enable the deactivated service and see if it solves the Windows Image Acquisition high CPU Windows 10 problem.
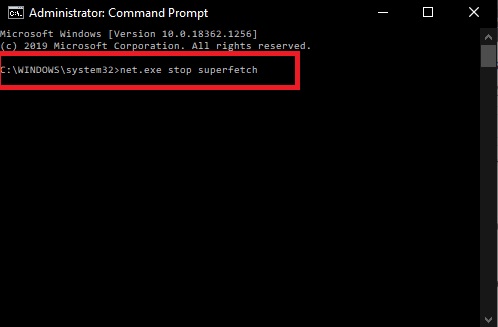
Follow the steps given below to disable SuperFetch:
- In the search box, type cmd and right-click it to run as administrator.
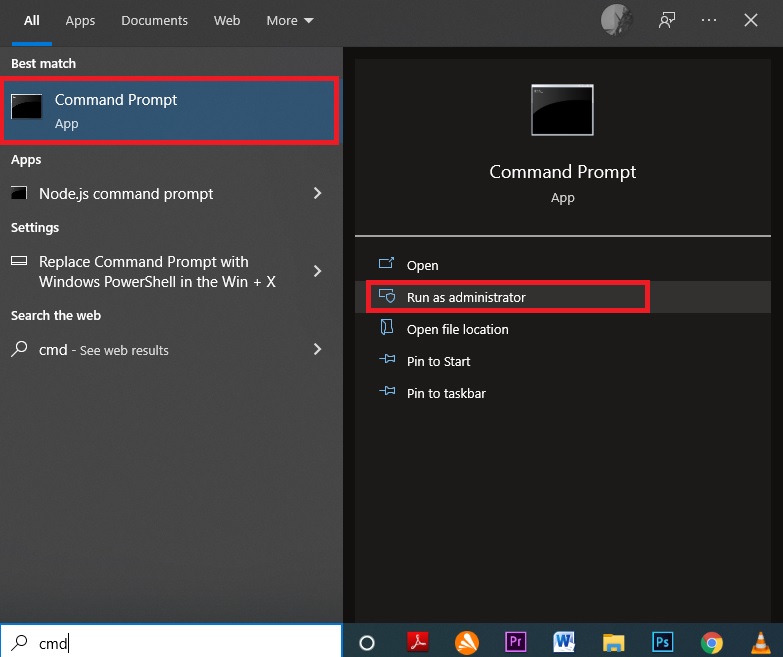
- Type the following command in Command Prompt and press Enter to run it.
| net.exe stop superfetch |
After closing both the Background Intelligent Transfer Service and Superfetch restart your computer. Now open Task Manager and check if the Windows Image Acquisition is not causing significant CPU usage. If the issue persists you can try solutions.
5. Disconnect Any Imaging Hardware
This is another solution that you can try to avoid high CPU usage. Disconnecting anything that could start and stop the Windows Image Acquisition service is a straightforward technique to detect hardware problems.
The most likely culprits are smartphones, cameras, printers, and scanners. If the problem goes away, you may plug them in one by one to figure out who’s to blame. It’s possible that you’ll need to upgrade the drivers or replace the hardware.
6. Update Graphics Drivers
Drivers are the basic requirement of the computer programs to run on windows 10. If your computer has out dates, Faulty or corrupted drivers on the system, it will start creating issues with the functions of programs.
Just like this if the Graphic Driver is not updated on your PC, Windows Image Acquisition could run abnormally. Because your graphic card drivers are mismatched or obsolete, WIA may use a lot of your CPU. To help you in this matter the best tool that can use here is Driver Booster.
Driver Booster is an advanced application that will automatically scan your whole computer for outdated drivers, faulty drivers, or corrupted drivers, and update them automatically. Here follow the steps to get started with the Driver Booster:
- Get Driver Booster, install it, and run it.
- In the Diver Booster, Hit on the big Scan button.
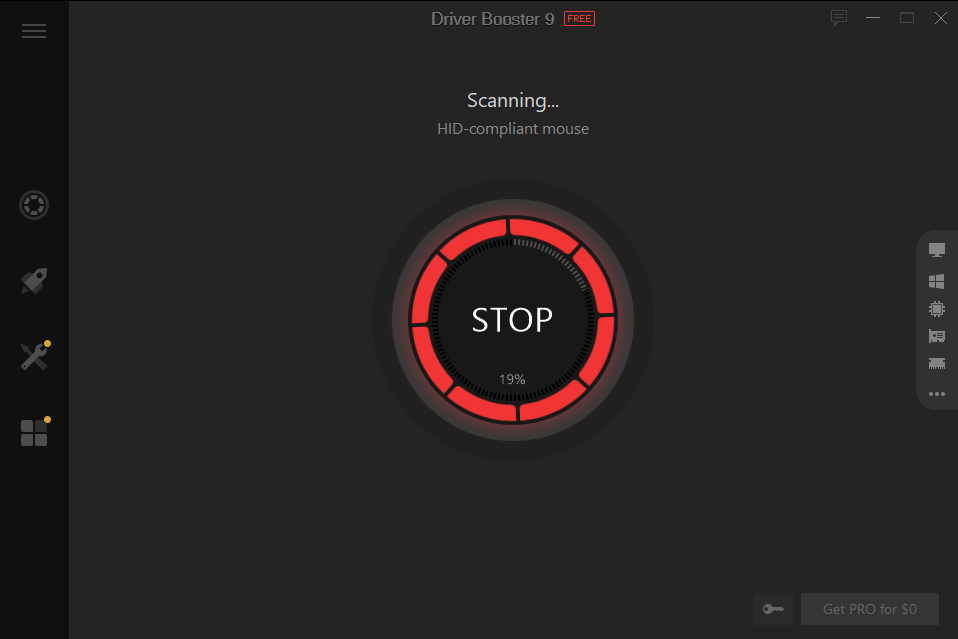
Once the scan is done, it will show the number of drivers that require to get updated. Click on Update Now to install all the drivers. (Read complete Review of Driver Booster PRO)
Conclusion
In this article, TechNinjaPro has listed the list of Solutions to fix Windows Image Acquisition’s high CPU usage on Windows 10. These fixes are recommended by windows users who have to utilize them to fix this problem.