If you are planning to start a podcast, the equipment you use will make a huge difference in the final result. The good news is that it doesn’t have to be expensive or complicated. Today, we present some of our favourite picks for equipment that every podcaster should own!
- A Good Microphone
- You Need a Great Recording Device
- A Good Headphone & Amp
- A Good Audio Interface
- A Good Digital Audio Workstation
- An Editing Program
- Good Speakers
- How to Set Up Your Podcasting Studio
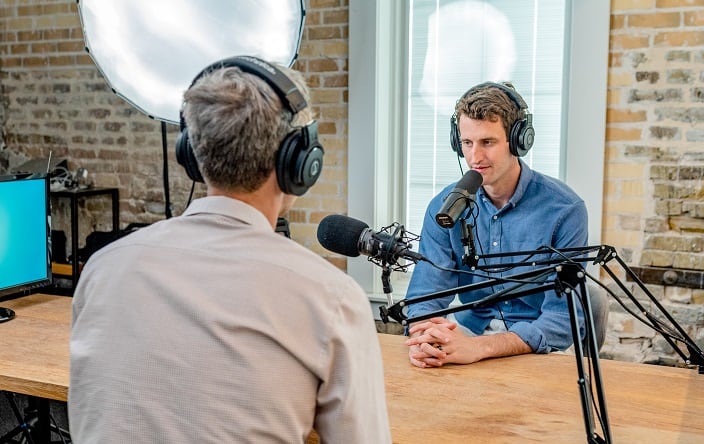
A Good Microphone
This is easily the most important factor when it comes to your sound quality. Anybody that has ever listened to a podcast knows what it sounds like when there is no good microphone to catch all of those lovely voices and sounds, so they can be broadcasted throughout the airwaves! A good microphone can get more of your voice in the sound, making people pay attention to you and what you’re saying. According to the folks at wiredclip.com, having a good mic makes podcasts sound professional when done right. Your listeners will know that you’re using a high-quality microphone, and not just recording on your computer’s built-in one. A good microphone evokes a feeling of professionalism, which can help establish trust within your audience!
There are two main types of microphones are dynamic and condenser. Dynamic microphones do not require external power to function, so you can plug them right in and start using them without any drivers or anything like that; however, they don’t usually produce as clean of a sound as condenser mics. Condenser mics need the power to operate. The type you need will depend on multiple factors, including whether or not you are recording in a studio environment with isolation from outside noise, or if you are doing impromptu interviews on a location where noise pollution could be an issue.
You Need a Great Recording Device
Now that you have a nice clean signal thanks to a good mic, it’s time to capture it. The most common ways to do this are through USB, Firewire, or digital audio interfaces with XLR inputs. In general, we recommend going with the digital audio interface as they deal with the incoming electrical signals after they have been amplified by the preamp, as opposed to the other two methods which bring those signals in “raw”, dealing with them at their original level of volume and quality and bringing them to the computer as an audio file after. When you take your good microphone and bring it into the realm of podcasting, make sure that it’s not just transmitting sound, but also capturing all those lovely sounds inside the room you’re recording in! Capturing a clean signal can be difficult if you don’t have a great device for this process.
A pop filter is also an absolute must-have. Podcasts are known for their crisp sounds, but there is one problem that most podcasters face at some point or another: Sibilance! When you record someone speaking who has an “S” sound in their verbalized words, the “ess” sound of the word will cause an unpleasant pop to occur on your recording. This can be easily removed by purchasing a simple foam rubber screen like this one which you can mount on any standard threaded mic stand or even just lean it up against something! And voila- no more pops!
A Good Headphone & Amp
Believe it or not, this is one of the most important pieces of equipment that any podcaster should own! Not only do they allow you to hear what’s going on during recording and editing sessions, but they’re also important for making sure you don’t disturb those around you There are two main types: Open-back vs Closed-back. Both have their advantages and disadvantages, though closed-back headphones tend to be more common due to their ability to block out outside sound. The downside is that they often produce more noise, so you’ll need to listen carefully to pick up on everything.
The headphone amp is perhaps the second most important piece of equipment to own after a good microphone, and it can be just as hard to choose because there are so many options! First, you need to figure out whether you’re going for an active or passive device. Passive amps use no power, but they often tend to be much larger than their active counterparts because they require more components, such as resistors and capacitors. Their advantage is that they do not produce any noise when properly designed and don’t need any connections beyond your headphones themselves—basically anything goes! Active amps on the other hand do require power and connectors (ADC and DAC) to function. They are considerably smaller because they have fewer components, but you need to be more particular when picking your parts to ensure that they won’t introduce noise into the signal chain.
A Good Audio Interface
This is what allows you to connect your microphone and headphone amp to your computer, so it can record everything digitally in the first place! There are generally two types of audio interfaces, external ones which have inputs for your various pieces of equipment i.e., microphones, headphones, etc as well as digital outputs which allow you to send all of this data onto a computer for recording. The primary advantage of external units is that they can often provide phantom power through XLR cables, but they are generally more expensive than their internally-powered counterparts. No matter what you choose, the main thing to keep in mind is that you should pick an interface with at least as many channels as your amplifier.
A Good Digital Audio Workstation
This is the software that gives you all of your tools for recording and editing. You can find them for free on the internet or through services like Ableton Live, Pro Tools, Cubase, Garageband, etc., though some come with a price attached. For example, Adobe Audition is one of our favourites, but it does require a subscription fee after the first 30 days of use (although this does include all future updates). This software will work as both a recorder and an editor, so you can start tracking your first podcast right away!
An Editing Program
Editing programs are what allow you to put all of the pieces together into one cohesive show ready for publishing. Again, there are lots of options ranging from free (Audacity is a great option) to budget-friendly, all the way up to expensive (Adobe Audition). All of them will work fine with different levels of results depending on your skill level, although Podifier is designed specifically for beginners who want to get a show-up and running as soon as possible. So check them out and see which one meets your needs! Choosing the right editing software is another important step that will allow you to put the final touches on your podcast before it goes live. The first thing to keep in mind is that you’ll generally need some kind of audio editor, so you can cut out any mistakes, clean up dialogue, change background noise levels, etc., but many people don’t realize that these are often broken down into two different categories: destructive or non-destructive. This type of editing allows you to edit audio without making permanent changes to your original file. You’re just changing what the program displays visually on the screen, with no effect on the actual recording itself (i.e., your voice still sounds exactly as it did before). So if you decide to change your mind later on, it’s no problem—just hit undo and the original recording reappears. The main drawback of this type of editing is that it can be very time-consuming because every single edit creates a new track in the program, which you then need to manually collapse into one.
Good Speakers
This is another piece that isn’t essential to the podcasting process, but it will help you create a better show. The reason for this is simple: everyone can hear what you’re doing when you put on your headphones and record, but not everyone has the same quality of equipment. For example, some speakers might be too bassy or trebly, so they may create an unbalanced sound—similar to how it would sound if someone was speaking with their hand covering half of their face. Speakers will give you an idea of how your recordings will sound to people who aren’t wearing headphones, which is important because it’s not your audience’s job to play detective and figure out where exactly the various elements i.e., multiple voices, background noise are coming from like they usually do with podcasts that haven’t been mixed properly.
How to Set Up Your Podcasting Studio
To begin with, you need to decide whether you’ll be recording your podcast on a computer (Mac or PC) or using an audio interface. For the latter option, do some research into the types of equipment that come with your preamp so that it will work seamlessly with what you’ve already selected. Afterwards, download and install any necessary drivers for all of your hardware. At this point, it’s also wise to test everything so that if there are any issues later—such as crackles in sound—they can be addressed before they impact the quality of your show. That way, all problems should be solved! The final stage is just setting up each piece of equipment where you want it to be so that you can just start recording right away. For example, your mic will go on in front of the speaker monitor with whatever pop filter or windscreen you have attached while all of your headphone connections are routed to the back so nothing gets in the way when you need to plug in later.
Podcasting is an easy way to get your voice out there, which makes it all the more important for you to make sure that it sounds great! Make sure you check out some of our other articles on podcasting equipment and gear to help make your show sound its best.