Before TechNinjaPro shows you how to free up storage on your Mac, a word of concern is in order. Hard drive cleaning needs time and expertise. So when in doubt, use a professional app. Let’s make some of the storage space for the files that truly deserve space on your Mac PC.
1. Optimize space with built-in tools
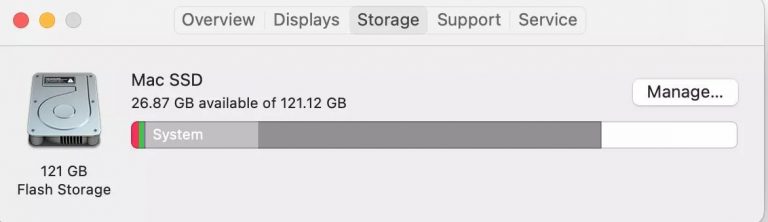
Regardless of how much free storage space you have, you can use more. Apple has come up with storage tools. To access them, open the Mac menu and tick About This Mac > Storage and then tick Manage.
To transfer all your big photos, files, and messages to the cloud, tick Store in iCloud. With a free iCloud plan, you can free up to 5GB of space. If you have a lot of data files you need to store in iCloud, consider buying a paid storage plan that will offer you 50 GB or 2TB of added storage space for your most files.

The Reduce Clutter features solve the age-old issue of finding useless files for deletion. Tick Review Files to see the unsupported applications and other data file you no longer need. Go through the list of unwanted files and remove the useless files one by one.
2. Remove unused applications and all their snippets
Mac provides numerous ways of deleting unused apps.
let’s start with the simplest one:
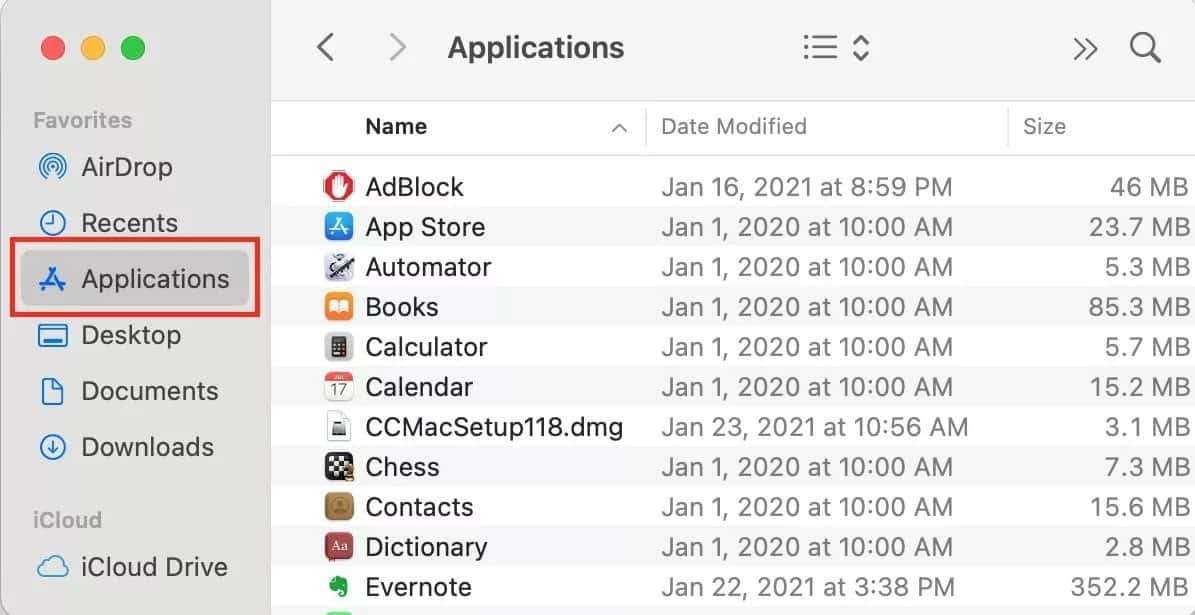
- Go to Finder and tick Application.
- Grab a useless application and drag it to the Trash.
- Empty the Trash.
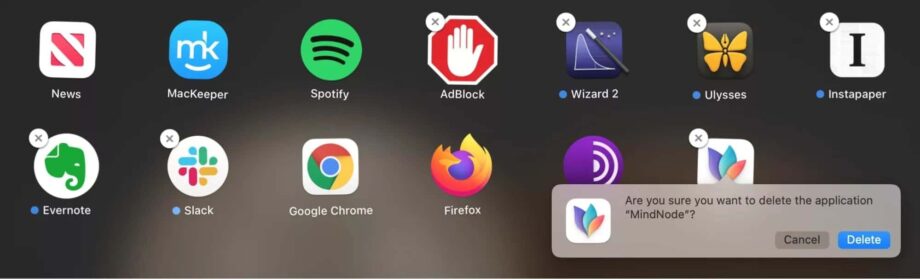
You can also remove unused applications via Launchpad:
- Open Launchpad.
- Tick and hold an application icon until it starts shaking.
- Tick the X symbol next to the application.
By removing unused apps via Launchpad, you can solve the surface-level issues of the applications themselves. But there are also app snippets that can use up to 10% of your space, depending on your Mac usage.
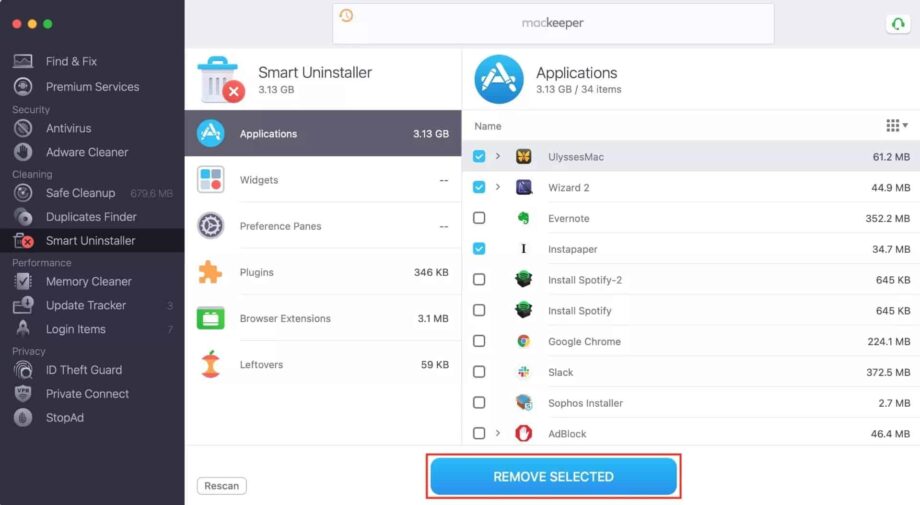
Here is how to correctly delete applications and the system junk they leave using a MacKeeper:
- Open MacKeeper
- Choose Smart Uninstaller from the left bar
- Confirm the boxes next to the applications you need to delete and tick Remove Selected.
- In the window that opens, tick Remove to confirm the deletion.
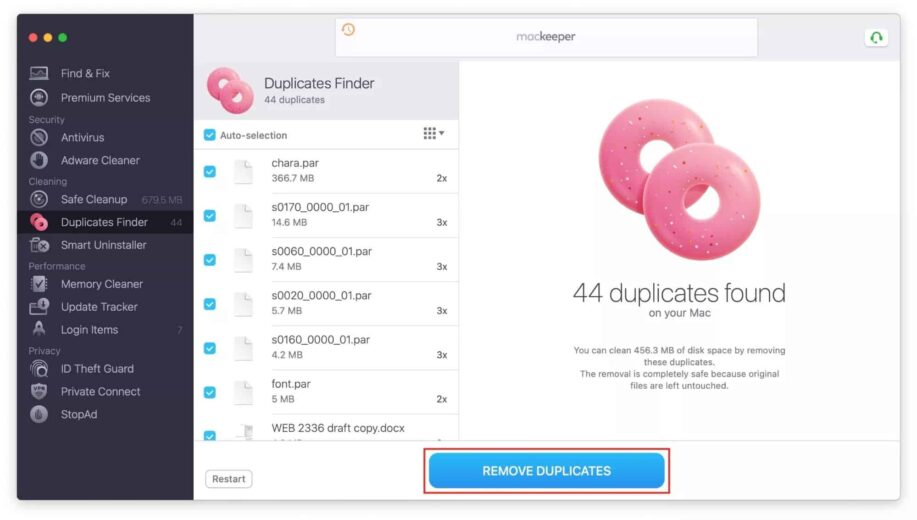
3. Locate and remove duplicate files and apps
When your Mac’s storage space reaches its limits, locate and delete duplicate files. How come your drive is messy with a duplicate? Well, it is a part of the user experience. Most users repeatedly download the same app installers or email attachments, edit photos, and make copies of documents and other unwanted files. In short, duplicates inevitably happen. And they can occupy up to 30% of your space. Leaving duplicate files and other clutter on your Mac is a waste of storage space. That is why Mac users download Mac cleaner.
- Open MacKeeper and choose Duplicate Finder on the left.
- Tick the Start Scan button.
- Check the Auto-selection box and tick Remove Duplicates.
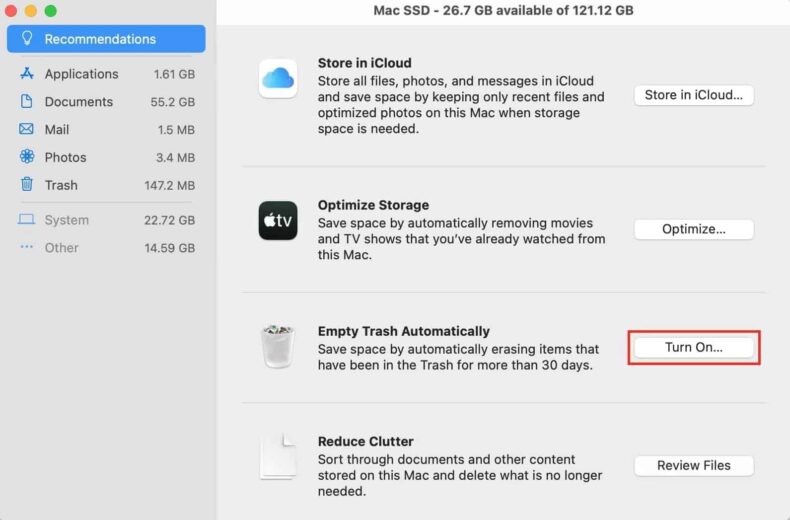
4. Empty Your Trash Cans Automatically
The Trash Can on a Mac system equals the Recycle Bin on Windows. Rather than permanently deleting data files from within the Finder, they are sent to your Trash Can so you can repair them later if you change your mind. To altogether remove these deleted files and free up the storage space they need, you will need to empty your Trash Can. But Macs can macOSneed multiple trash cans, so you may need to empty several.
To empty your Mac’s Trash Can, right-tick the Trash icon at the bottom-right corner of the dock and choose Empty Trash. This process will delete all the files you sent to the trash from the Finder. Generally, you need to empty the Trash manually, and however, you can automate this method. You can save around 30% of your hard drive each month by allowing this option.
- Go to the Mac menu and Choose About This Mac.
- In the Storage tab, tick Manage.
- Next to the option Empty Trash Automatically, Tick Turn on.
5. Clear browser cache
If you are an internet savvy user, your Mac’s hard drive is likely to be full of temporary data files known as the browser cache. This browser cache helps to load recently visited pages faster. At the same time, unnecessary cache files reduce the available Mac storage space, thereby slowing down your Mac. By cleaning the browser cache files, you will clear space on Mac. Not a significant victory, but it is appreciated.
To clear the browser’s cache:
- Open the browser and tick the three-dot icon at the top right.
- Tick More Tools > Clear Browsing data.
- Select a time range to clear the internet browsing data.
- Also, clear Cached images and files.
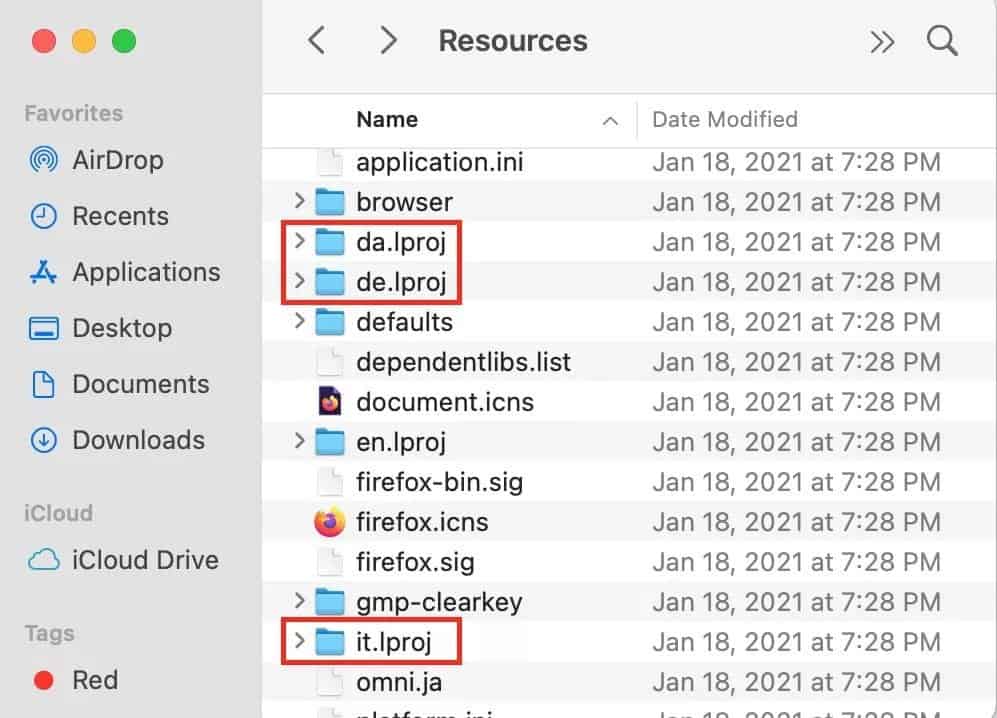
6. Delete unwanted language files
MacOS comes loaded with more than 180 languages, and All these linguistic treasures reside in localization files that take up around 1.5GB of hard drive space. How many of the offered languages do you use? Chances are few, while the rest sit there occupying disk space. Let’s fix it.
- Go to the Applications folder.
- Right-tick an application and choose Show Package Contents from the drop-down menu.
- Open the Contents folder and click the Resources folder.
- After opening the Resources folder, delete all subfolders that end with .lproj except those you want. Note that localization files for Spanish and English are en. lproj and es. lproj.
- Empty the Trash Can.
Manual deletion of language files can take an unsettling amount of time. To speed up the deletion process and optimize storage on your Mac, use MacKeeper. MacKeeper takes only a few seconds to delete localization files and other unwanted system junk.
7. Clean your Desktop
Screenshots, images, reports, and other files are scattered all over the desktop. Once you reduce the clutter, your Mac PC will perk up and start working faster. So look through your desktop files and images, and some can be transferred to other folders while others can be deleted to clean up space on your hard drive.
- Open Finder and tick Desktop.
- Under View, select a List.
- Sort out the files by size and delete the big files.
If you are running Mac, click anywhere on the desktop and select Use Stack in the opening window. With just a few clicks, you will manage to reduce the clutter.
8. Remove big mail attachments and junk mail
When you are busy in social and professional life, which involves a lot of email correspondence. Emails on their own do not create trouble storage-wise, but they often come with attachments, pictures, documents, and other files. And once opened, mail attachments stay on your Mac forever, keeping GBs of valuable space for themselves. Unless you delete them.
- In the mail, navigate to Preferences.
- Find the Remove unedited downloads option in the General tab and set it to After Message is Deleted.
While it is not recommended to delete regular emails since you might want them one day, you can do without junk mail. Let’s look at how to free up storage space on Mac by deleting junk mail:
- In the Mail, navigate to Preferences.
- Locate the Erase junk messages option in the Accounts tab and set it to one month.
Another efficient way to create usable hard drive space for yourself is to store your emails in iCloud.
- Go to the Apple menu and tick System Preferences.
- Tick Apple ID.
- Tick iCloud.
- Check the box next to Mail.
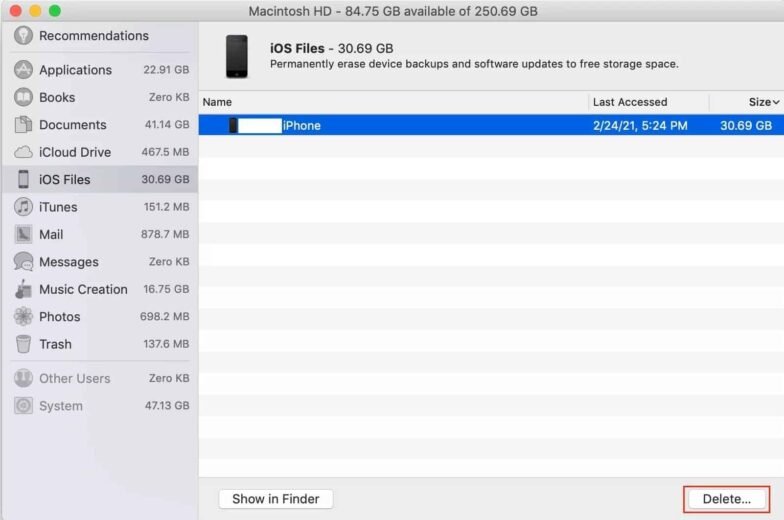
9. Remove old iOS backups
Backing up your Mac is an integral part of data protection and simply a perfect habit to have. Mac backups are supposed to be temporary files rather than permanent files on your Mac PC. It is really simple to optimize space by deleting old iOS backups.
- Go to the menu and click on About This Mac.
- In the Storage tab, tick Manage.
- In a window that opens, tick iOS files.
- Pick the old backups and tick Delete.
- Confirm the deletion of old iOS backups.
10. Clean up the Downloads folder
Have you ever downloaded an app? Of course, you have. Now you get a lot of enjoyment from using it, while the application’s installer just sits in your Download folder. Cleaning old download files is a tried and true way to remove clutter on your Mac and free up storage space for your vacation videos, photos, and other valuable files.
- Open Finder.
- Choose Downloads on the left.
- Right tick the useless files and choose the Move to Trash option from the drop-down menu.
- Empty the Trash Can.