
Steam provides cloud-based services, so, usually, you sometimes experience such issues. Steam service is very famous among gamers, and it has a vast user base. It is tough to understand that the service provider causes the error, and it is most likely the issue is on the user end.
In this blog, TechNinjaPro will provide the best solutions that can help you resolve this issue.
1. Update Driver
Having your drivers updated is very important, as it plays a vital role in the functions of windows computers. For gaming purposes, your graphic driver has to function properly. Otherwise, you will not be able to play on the computer. The network driver is also essential, as the issue with Steam stopping downloading is directly linked to the internet.
Therefore, you should check the drivers on your Windows computer if you experience an issue with the steam app. There are two ways which can be used to update drivers on the computer, manually from the settings or use a third-party program to locate and download drivers automatically. TechNinjaPro will show you both methods so you can use whichever is more convenient for you.
Follow the given steps to download Drivers from Settings:
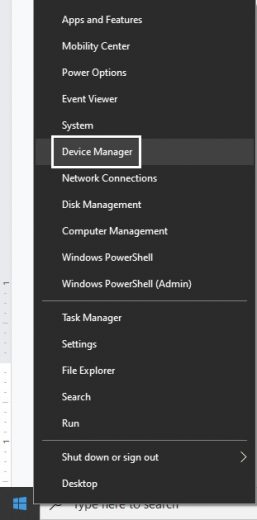
- Go to the Device Manager by right-clicking the Start button.

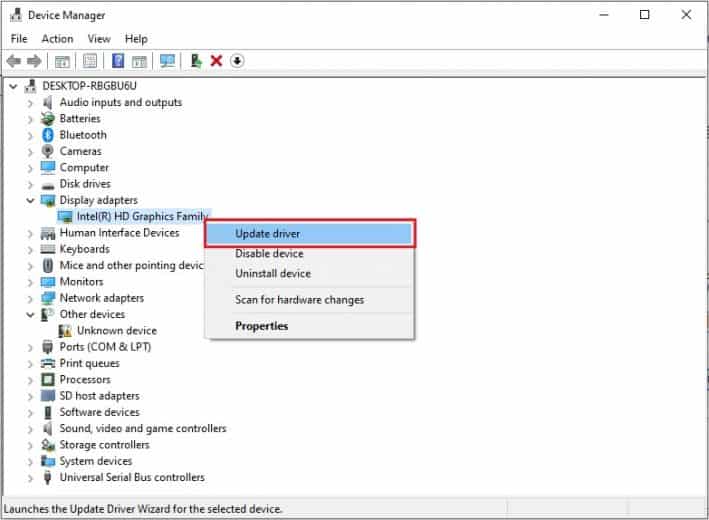
- In Device Manager, expand Display Adapters, then right-click the Intel(R) HD Graphics and select Update Driver.

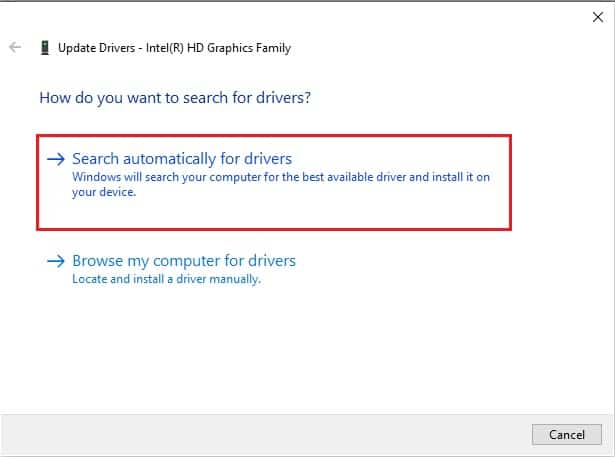
- Select Search automatically for the drivers’ option, and it will start downloading the Network Driver.

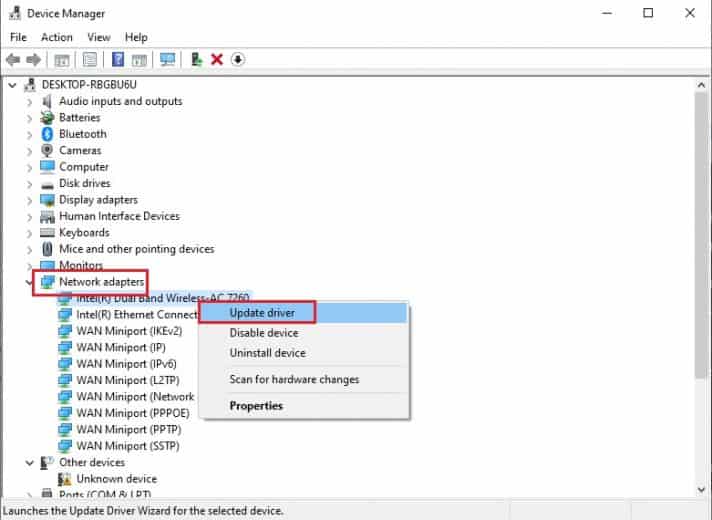
- Repeat the same process with Network adapters in Device Manager.
- Expand it, and then right-click the network driver and select Update Driver.

If this process seems very lengthy and challenging, you can also try Driver Booster, which will find any outdated and faulty drivers on the computer and update them automatically.
Follow the instructions given below to utilize Driver Booster in the best way.
Follow the given steps to download Drivers automatically:
- Get Driver Booster, install, and open it.
- On the Driver Booster app, click on the big Scan Button.

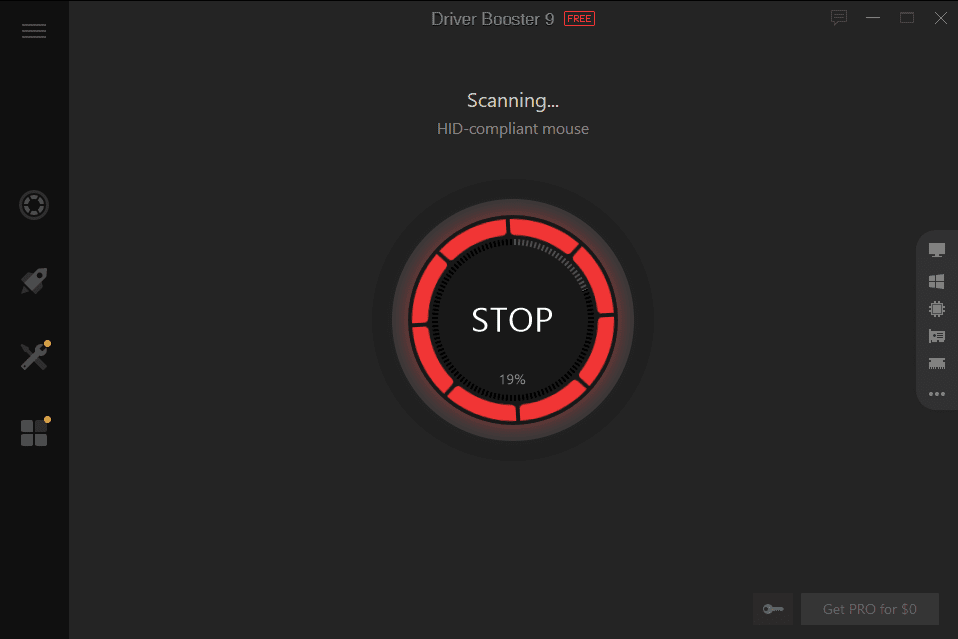
Driver Booster will then scan the computer for Corrupted or outdated drivers and even those missing from the system.
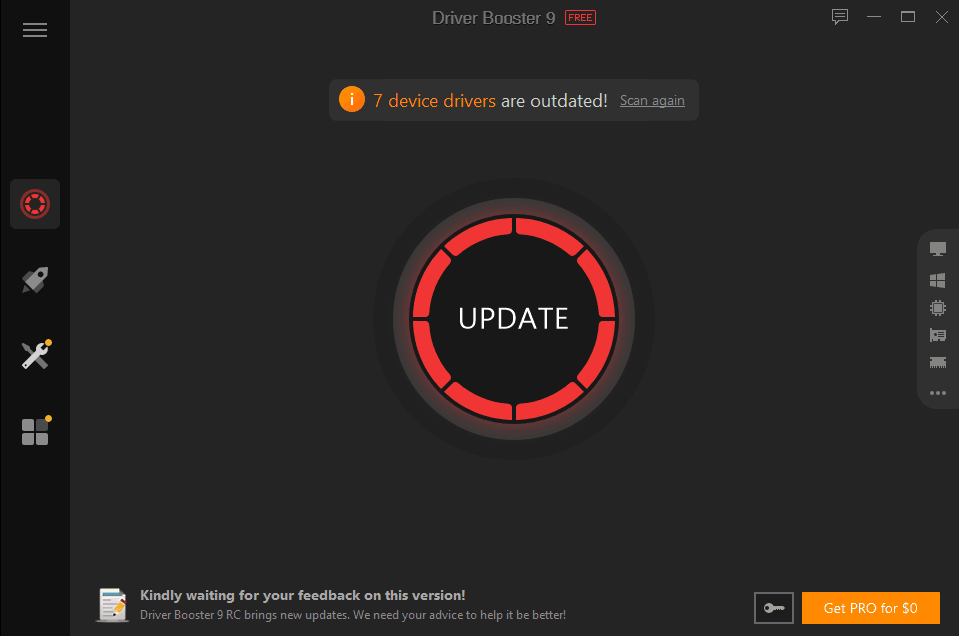
At the end of the Scan, it will show you a list of drivers that require downloading or updating.
- Find the network and graphics driver and click on the Update button.

- You can also click on the Update Now option at the top to download all the drivers at once.
Driver Booster will download the drivers for you. After this, you can try downloading or updating the Steam app. If the issue is resolved, Steam will work properly. Otherwise, you can keep looking for solutions. (Read complete Review of Driver Booster)
2. Connect the Steam Client to the Internet
It is normal that you mistakenly change the settings and start experiencing a particular process, and you may change the default setting on steam. There are options called Go offline and Go online in the steam client that allow you to connect and disconnect from the network as needed.
If you are experiencing issues with the steam app, playing with that setting might solve the issue. Follow the steps to proceed with the process:
- Click on Steam in the upper left corner of your Steam CLIENT dashboard.
- Click on the Go Offline option.
- When prompted by the pop-up screen, select ‘Restart in Offline Mode.’
Allow a few seconds for the system to register the updated settings, return to the upper left side, select ‘Steam.’ Select ‘Go Online’ this time, then ‘Restart and GO Online’ on the pop-up screen that appears.
3. Reboot your router
If the issue with the network does not resolve from the computer, you can try a few things to check if the issue is settled. You can first try to change the router’s location to make sure there are no electromagnetic waves closed to it that create resistance to its process.
You can also reset and reboot your router. This will effectively wipe out any network or connectivity issues that may be preventing Steam from downloading.
Follow the given steps:
- On your router, look for the Reset button.
- Allow the router to power on, and You may require any pointed object to push and hold the Reset button.
- Hold the button down for around 15 seconds.
- Wait for your router to reset and then turn it back on.
4. CHANGE YOUR DOWNLOAD REGION
Steam stop downloading can be caused due to the region you are downloading in, and changing the region of download may solve the issue.
Follow these simple steps for the purpose:
- Launch the Steam Client on your computer.
- In the upper left corner of the app, select Steam.
- Under Settings from the dropdown menu, navigate to Downloads from the list.
- Choose a different region by selecting from the dropdown menu under Download Region. Your choice should be a foreign place that is not too far away from your current location.
After the process, the location of your download is changed. Now you can try updating Steam and see if the issue is resolved.
5. Change to Lower Steam Download Bandwidth
Network bandwidth is another issue that can cause the stopping steam download. There is nothing to worry about, and this issue can be resolved by simply making a few changes in the settings of the Steam app. Follow the steps to fix the bandwidth issue.
- Launch the Steam Client and select Steam from the top left corner.
- Navigate to Downloads from the dropdown menu.
- Locate Limit bandwidth in the right pane and select a value from the dropdown box.
Click OK after you’ve established a bandwidth limit for downloading Steam, depending on your internet connection speeds. Now you will need to re-download or update the Windows Steam app to see if you can do so.
6. Match Windows Time and Date
Different times and Dates between the Steam application and Windows can also affect the program’s operations. When you launch a Steam game on Windows 10 with default settings, it is reported that the game will detect a date and time.
If your PC time is not synchronized with the internet, then that means you need to do it, or it will keep resulting in Steam downloads halting and starting. Follow the steps to sync your computer’s time and date.
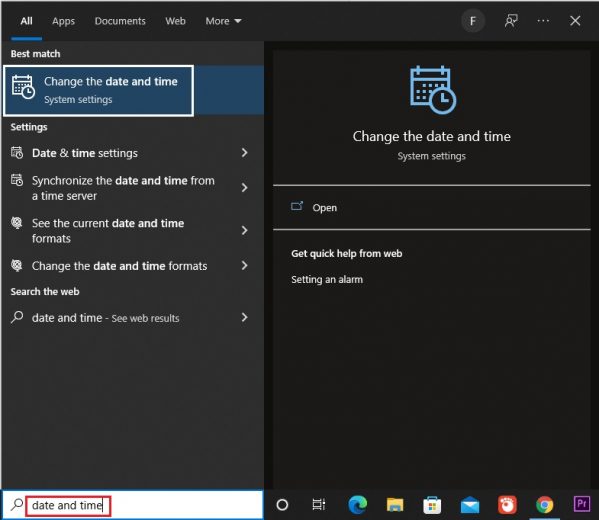
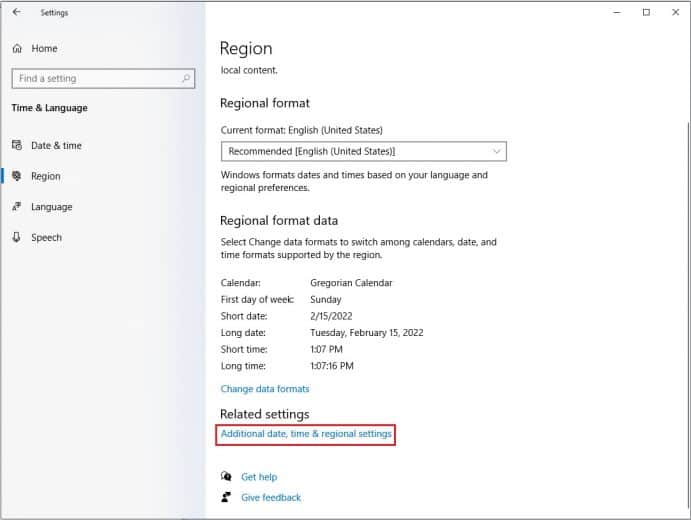
- Type the date and time in the Start menu, and then press Enter to open Change the date and time settings.

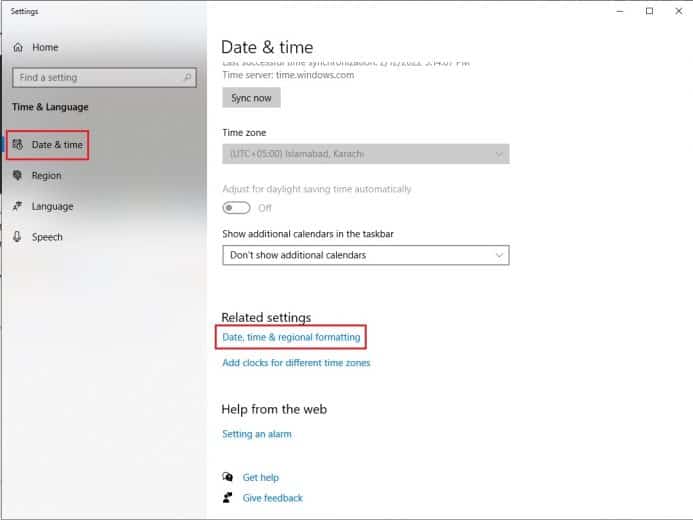
- Select Additional date, time, and regional settings from the Date & time menu.


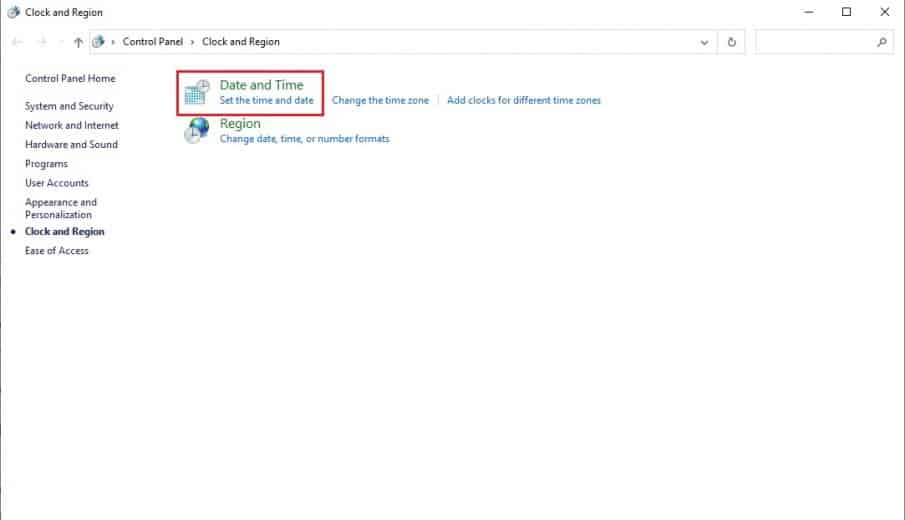
- Finally, select Set the time and date.

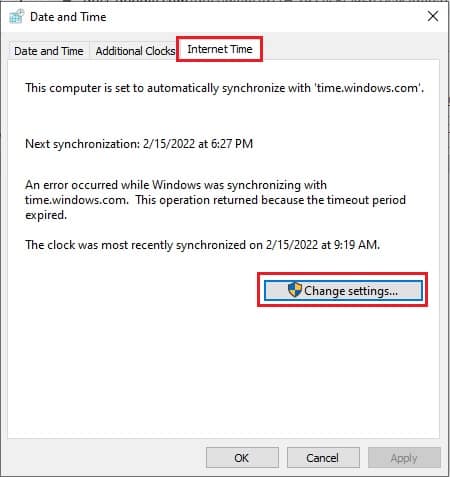
- Select Change settings beneath the Internet time tab.

- Check the option for Synchronize with an internet time server in Internet Time Settings, then hit OK.

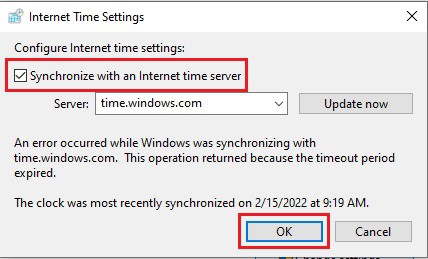
Following that, you’ll be able to begin downloading Steam for Windows 10.
7. Turn on the .NET Framework
Some programs on Windows require the.NET Framework to perform appropriately. Steam can start working smoothly if you activate the .NET framework for Windows 10. Follow the procedures below:
- Search Turn Windows features on or off in your Start search bar, then press Enter.
- Expand .NET Framework 3.5 in the Windows Features window, then tick the box for the sub-folders.


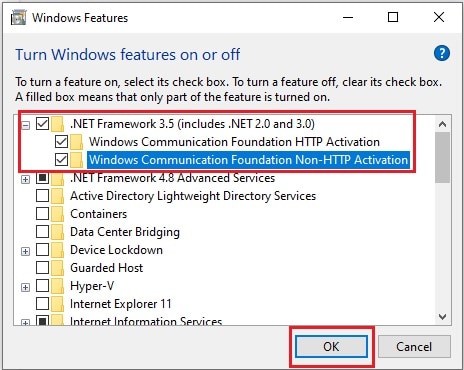
After enabling all of the .NET framework options on Windows 10, Steam may be downloaded and updated without issue.
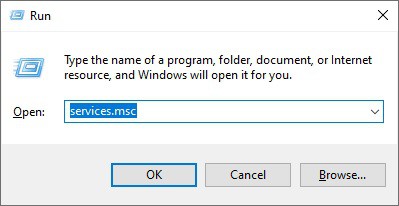
8. Disable CDPUserSvc_3e1f2 Service
This option is also available to resolve the Steam app not downloading or updating on a Windows computer. In this fix, you need to disable the CDPUserSvc_3e1f2 process.
This service may cause your Steam download to become stuck or stop working. Follow the steps to disable the CDPUserSvc_3e1f2 process from the windows settings.
- Open the Run box by pressing Windows + R and type services.msc in the search. Then press OK.

- A new Services window will emerge.
- Scroll down in the Services setting until you find the CDPUserSvc 3e1f2 process, then right-click it to open its Properties.
- Next, locate the Startup type in the Properties window and select Disabled.
- To save your changes, click Apply and OK.
9. Clear the HTML Caches
Show hidden files and folder
The issue of Steam will be resolved by clearing the HTML Caches. To continue, follow the steps outlined below.
- First of all, make sure the Steam application is not running.
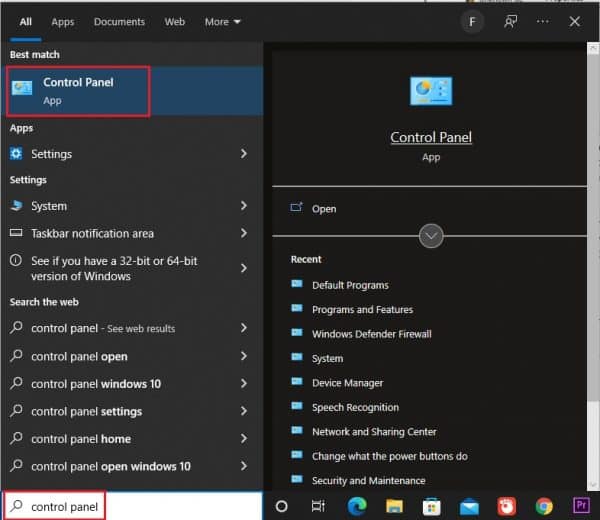
- After this, go to the Start menu, enter Control Panel into the search box, and hit the Enter key.

- A Control Panel window will display on the screen.
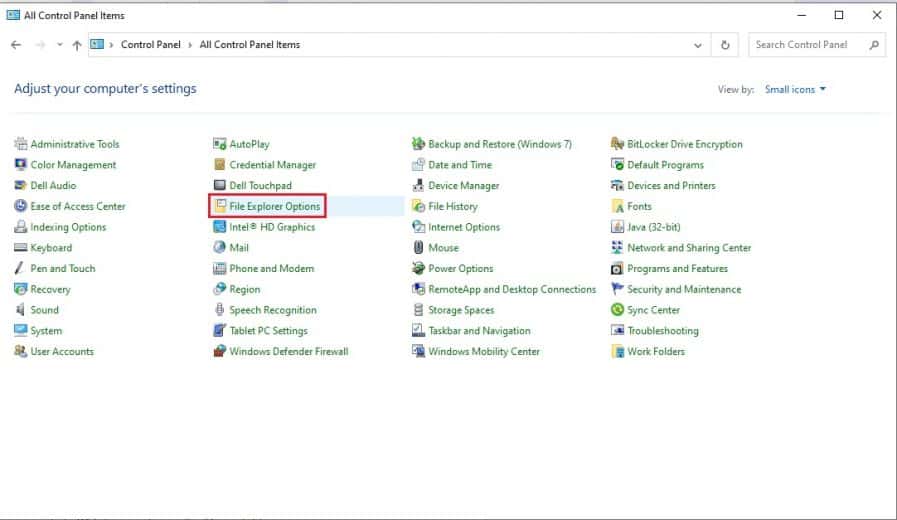
- Navigate to the Category at the top-right of the page and choose Small icons from the dropdown menu.

- Following that, you will be presented with a list of apps from which you must choose File Explorer Options.

- Then a new pop-up window will appear, and you have to select the View tab from the top of the page.
- Now go to the Hidden files and folders section and check the Show hidden files, folders, or drives option

- After completing the primary task, click the Apply button and the OK button.

Clear HTML Caches of the Steam
- Now go to your computer’s (C:) drive and open the Users folder.

- Choose your username from the list in the next window.
- Select AppData from the list of folders that appears shortly (or you can use the pathway “C:\User\username\AppData\Local\Steam\htmlcache”.
- Find a folder named Local in the AppData folder; open it.
- On the next page, look for the Steam folder and click on it.
- You will get the HTML cache in the ‘Steam’ folder; simply open it.
- Here, press the CTRL + A key to select all files and remove them permanently by pressing the Shift and Delete keys together.

10. Clean the Download Caches of Steam App
- Start the Steam application.
- Click on Steam at the top right corner of the page. Select Settings from the dropdown menu.
- You will see various options in the left panel of the Settings. Click on Downloads.
- A download page will display on the screen shortly; scroll down and click the Clear Download Cache button, then hit ‘OK.’
After completing the initial process, Steam will relaunch, and you will be prompted to enter your Steam credentials. After logging in to Steam, try to update Steam to see if the issue is resolved.
Bonus Tips – Set Game Mode for Steam Games Automatically
Every latest smart device comes with the feature of Game mode, which provides the best experience to gamers. Once you repair the steam download stopping issue, use this method to automatically set the game mode for Steam games.
In this fix, TechNinjaPro recommends you to use Advanced SystemCare to speed up the system for your games and switch your PC to the Game mode when you’re playing.
It has been observed that using Advanced SystemCare to improve games has been beneficial. You might try using it with Steam games as well.
- Get Advanced SystemCare, install, and run it.
- In the program window, find the Speed Up option and then turn on Turbo Boost in Game Mode.
As a result, Advanced SystemCare will shut down any unwarranted or non-windows programs that aren’t related to your game, allowing it to run faster. Now you may relax and enjoy the games. (Read complete Review of Advanced SystemCare PRO)