CPU priority can be set in two ways on the Windows operating system. One is using a control panel and the second way is using a registry editor. Both are easy ways and in this article, you will find solutions that will make these methods easier to execute.
1. Change CPU Priority from Control Panel
In the control panel, you can change the performance of your favorite software and apps. It comes set as default but there is a possibility that you may have changed it unknowingly. You may now improve the performance of your computer by following these simple steps:
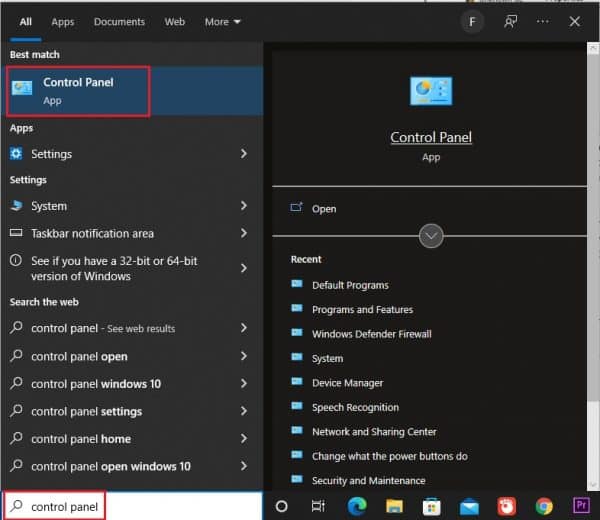
- Go to the Control Panel from the Start menu.

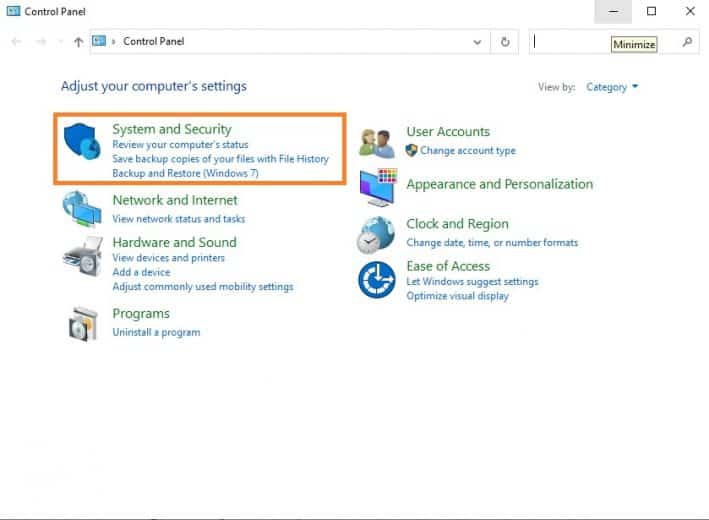
- Click on System and Security in the Control Panel.

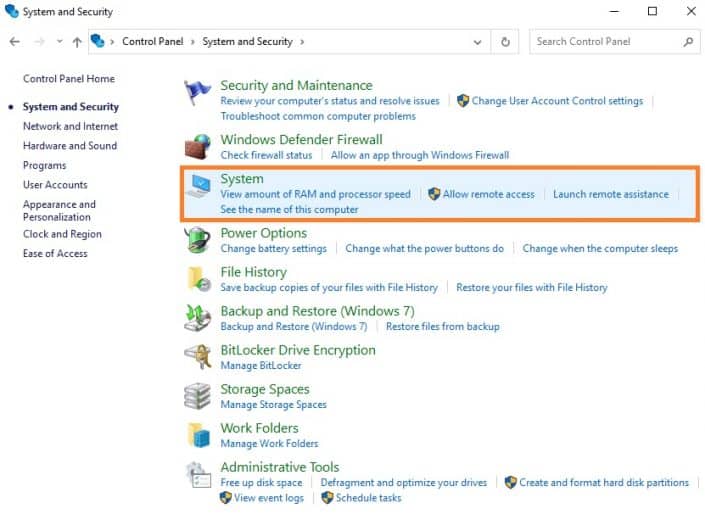
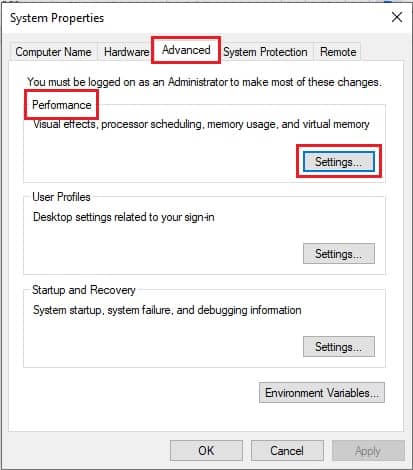
- Inside the System and Security, select System.

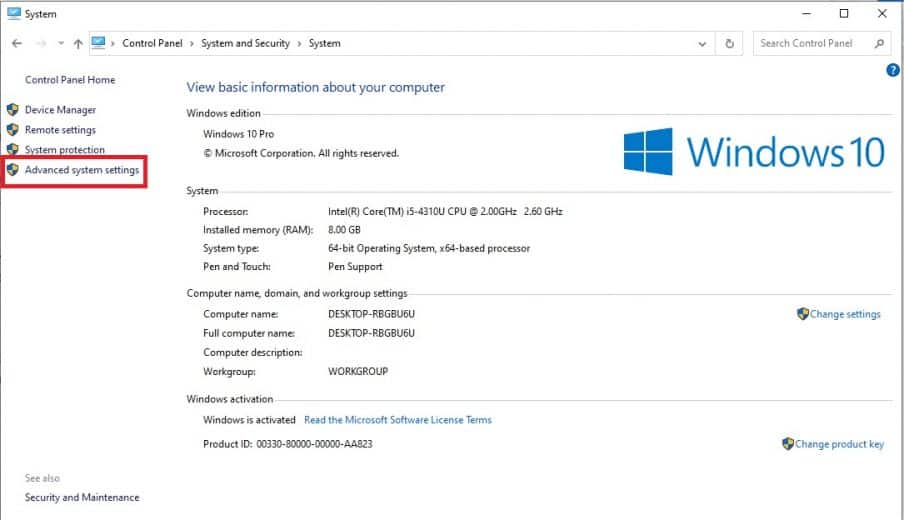
- Navigate to Advanced System Options on the side menu of the System setting window.

- Select Settings (under Performance) from the Advanced tab of System Properties.

- On the Advanced tab of the Performance Options window, check the box for Programs to Adjust the best performance of it.

- Then, click on Apply and Ok.
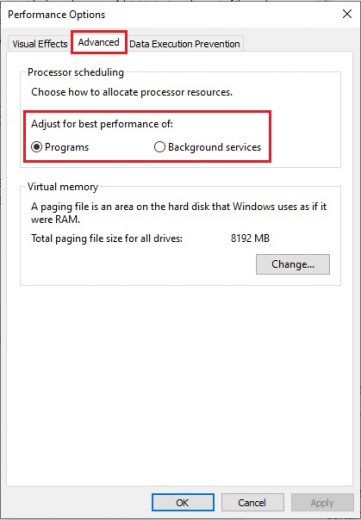
After doing this, you have set the CPU priority to prefer foreground apps but if you want the computer to set CPU priority to foreground apps you can simply check the Background services option
By selecting the foreground, you will not cause any issue in the process of any background. You are free to run some programs, including Avast, without difficulty. If you want to give priority to certain background applications only, the registry editor can help you with that.
2. Adjust CPU priority in Registry
Set the CPU power in the registry is another approach for you to allow the foreground programs to have priority. Different DWORD values for this key can substantially alter the performance of both the preferred applications and the background services on Windows 10.
- Press Windows + R keys simultaneously to open the Run window.
- type Regedit in the Run search and hit enter.

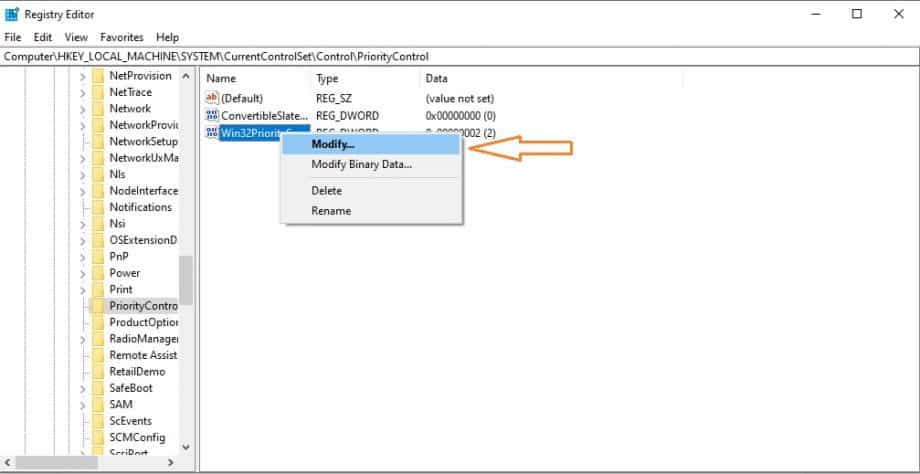
- Follow the steps in the Registry Editor to locate the PriorityControl HKEY_LOCAL_MACHINE\SYSTEM\CurrentControlSet\Control\PriorityControl.

- Right-click the Windows32PrioritySeparation to Modify under PriorityControl in the right pane.

- In the Edit DWORD Value window, adjust the Value data to 28 (40 for decimal), then OK to save the change.


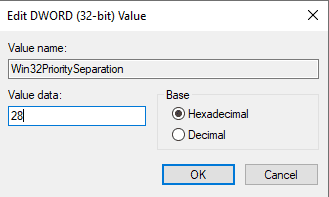
If you set the level for Win32PrioritySeparation to 28, you’ll be able to give foreground programmes priority. However, if you want to make the background software a priority, simply set the number to 20. (32 for Decimal). For the time being, your favorite foreground programmes can take precedence.
In other words, whether you want to adjust CPU priority to favor foreground or background services, these two options are always available.
Bonus solution
This solution is for those who find it difficult to navigate on different settings and then solve the issue. This fix will use Advanced SystemCare which will solve this issue for you automatically.
Advanced SystemCare is an all-in-one tool and application optimizer that automatically sets program priorities to high, low, and normal.
Advanced SystemCare allows you to see which applications have the highest priority. Follow the steps to get started with the tool:
- Get Advanced SystemCare, install it, and run it.
- Then, under Toolbox, look for Process Manager and click it.
- You will notice that Advanced SystemCare is automatically installing Process Manager for you.
- In IObit Process Manager, right-click the application and select Set Priority High from the Processes menu.
On Windows 10, you can see how much CPU these foreground and background apps use, as well as their priority. Simply allow Advanced SystemCare to change the priority on its own. (Read complete Review of Advanced SystemCare PRO)