The following are the procedures to take to reactivate the proxy settings in Windows.
1. Both your Computer and Router will need to be Rebooted to Complete the Process
Whenever possible, it is a good idea to restart your equipment before proceeding to more difficult troubleshooting steps. Your problem may be handled in a matter of minutes.
- It is unlikely that restarting your network will be of assistance because this issue is typically caused by a fault with one computer’s configuration. Consider giving it a try the next time your network experiences an issue of any type.
- If the issue persists after you have rebooted your computer and router, proceed to the more specific methods in the following section of this article.
- Examine the Windows Proxy Configuration options.
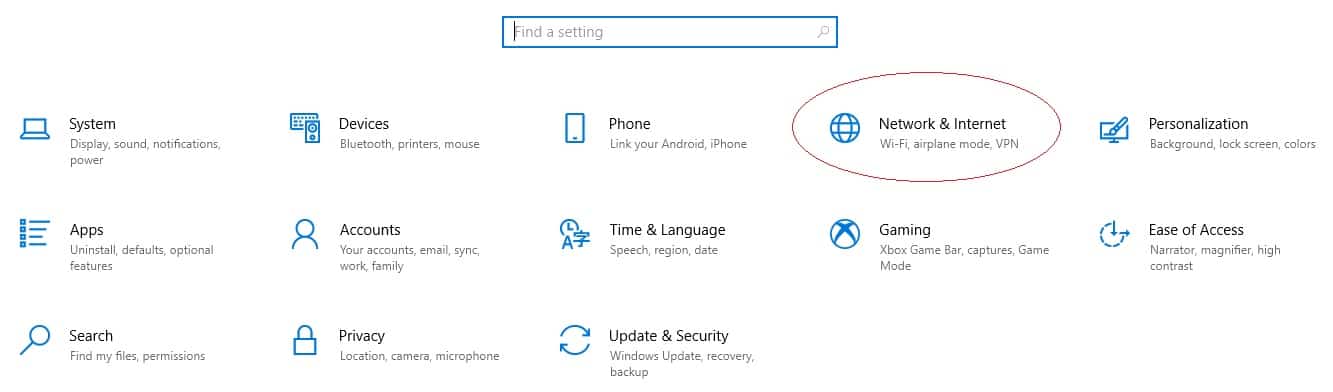
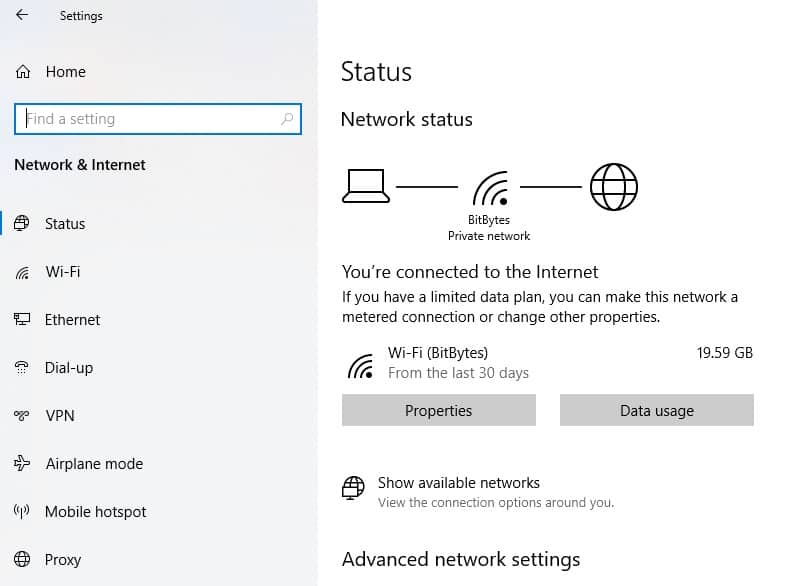
- It would seem logical to begin by checking your Windows proxy settings, as this could be the source of the issue in the first place. You can find the proxy server configuration options for your Windows 10 computer in the left-hand sidebar of your Network & Internet option in Settings.
Configure Public Proxy on Windows 10
To configure a public proxy on Windows 10, follow these steps.- Open the Settings App (Win+i keyboard shortcut).

Network & Internet - Go to Network and Internet.
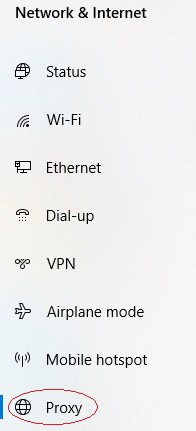
- Select the Proxy tab.

proxy tab - Scroll down to the Manual Proxy setup section.

Manual Proxy Setup - Turn the Use proxy server switch on.
- Enter the server address and port number.
- Click Save.
- The proxy is now active
- Open the Settings App (Win+i keyboard shortcut).
- The proxy server configuration is included in this section. If you do not intend to utilize a proxy server, the Use a proxy server checkbox near the bottom of the page should be disabled (which is the case for most home users). Turning it off will cause it to become unresponsive.
- It is important to check with your system administrator to ensure that you have provided the necessary proxy information if you are connecting through a proxy, such as at work or school.
- After this point, try to reconnect to the network to see if it works. The automated detection of proxy settings can be turned off under the proxy options if the problem persists.

2. What Precisely is a Proxy Server, and How Does it Work?
We won’t go into too much detail because attempting to resolve this proxy setup issue will consume a significant amount of your time and effort.
Understanding what a proxy is and why Windows can have issues with it is beneficial, even if it is not strictly necessary at this time.
Proxy servers serve to connect your computer to the rest of the internet by acting as a conduit. Instead of connecting directly to the internet, you connect to a server, which then retrieves information on your behalf from the internet.
Security and efficiency are two of the most important reasons that system administrators utilize these technologies in the workplace and schools.
In most cases, unless you set one up, you will not be making use of a proxy server in your home environment. If you have any proxy settings enabled, you should disable them immediately.
3. Launch the NIC Troubleshooter program.
The Internet Connections troubleshooter is triggered when you right-click on the network connection icon in your System Tray and select Troubleshoot from the pop-up menu that appears.
“Windows was unable to recognize proxy settings,” as the error message indicates, is the result of this. More information may be available from a network troubleshooter which is hired separately.
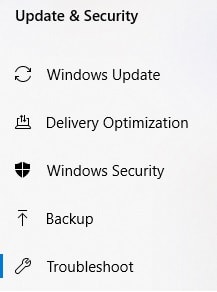
- In the Settings menu, look for the Troubleshooting section.

troubleshooting - A Network Adapter should be selected from the list of available troubleshooters.
- And then follow the on-screen instructions. For experienced Windows users, these troubleshooters aren’t always effective, but they’re worth a try in some situations.
4. Obtain DNS and IP addresses in a Fully Automated Manner
Proxy server troubleshooting options are limited, as it turns out, due to the nature of the technology. Additional recommendations will be provided in the future; however, keep in mind that the debugging process is very similar to that of the Windows problem resulting in “No Internet Access.”
Even if you have the correct proxy or DNS settings, you may still have this problem.
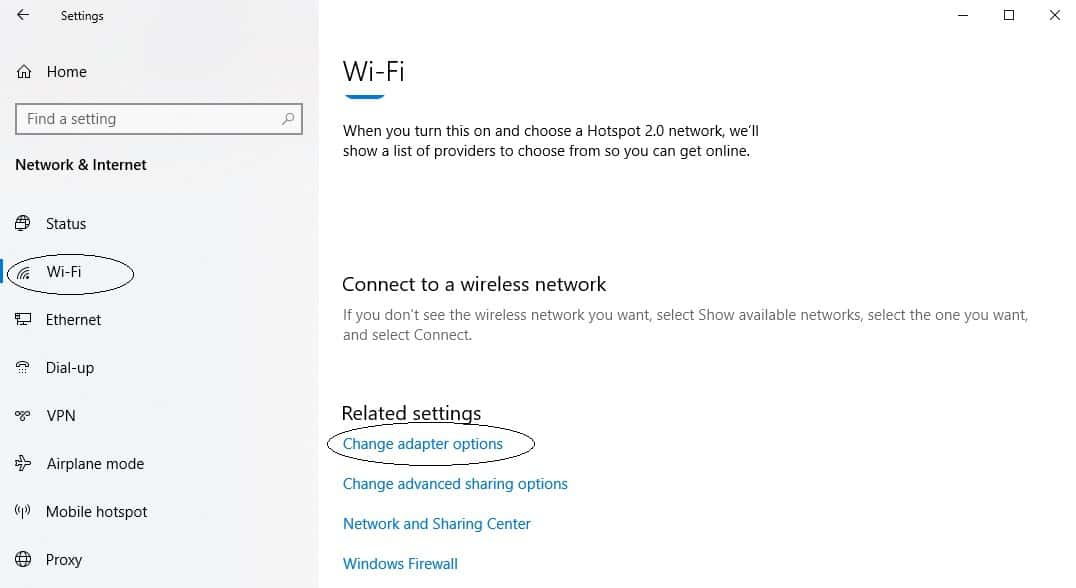
- Go to Settings > Network & Internet.
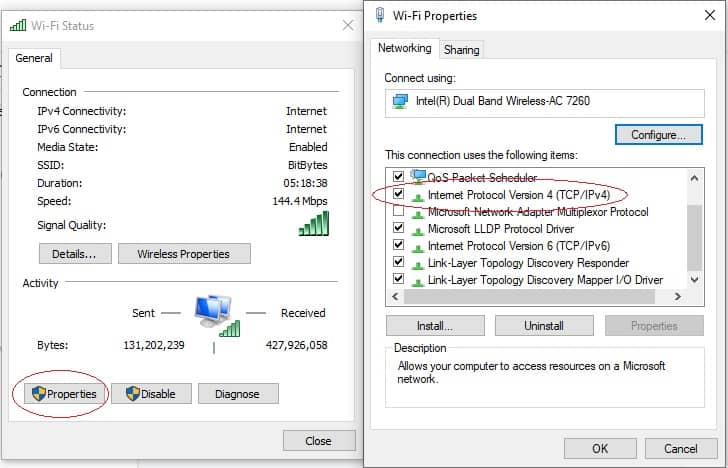
Network & Internet - Double-click the Network Connection that you’re currently using after clicking the Change Adapter Options button

change adapter options - Select Properties, then check the Internet Protocol Version 4 box from the list. Hit OK once done.

internet protocol - You can choose whether to receive an IP address automatically, as well as whether to receive the DNS server address. In this section, improper settings will prohibit you from being able to connect to the web.
5. IP Addresses for Windows
If a network driver is out of date, connection issues may arise. If this is the case, you may have recently installed a faulty network driver updating package. If the driver is changed, it may or may not be possible to remedy the proxy message issue.
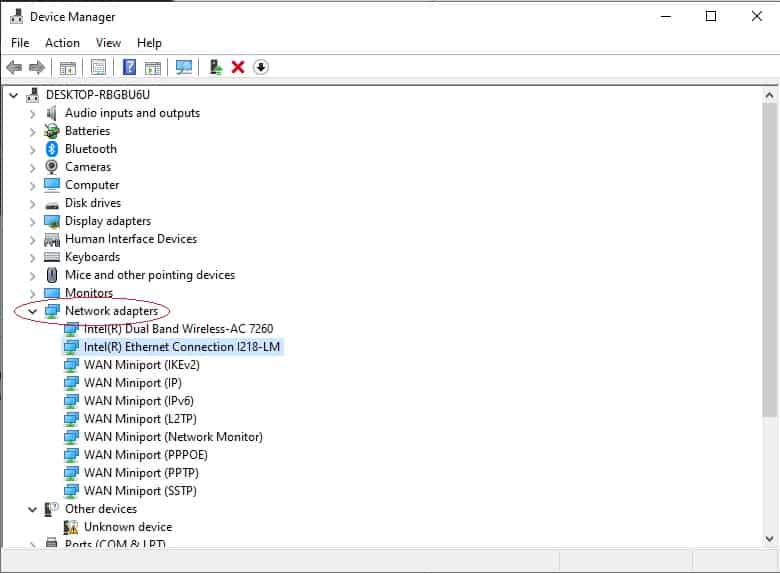
- The Device Manager can be accessed by right-clicking the Start button and selecting Device Manager from the context menu that appears.

device manager - When you’re in the Network Adapters area, select the connection that you’re currently using by double-clicking on it.

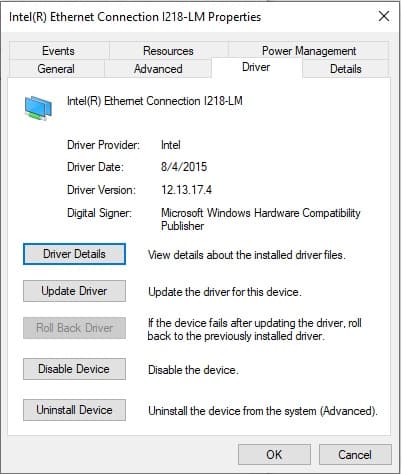
network adapters - To return to the previous version of the driver, select Roll Back Driver from the Driver tab after that.

roll back driver

If you have recently upgraded your computer and are encountering this problem, this may be a solution. It is possible that it will not be available in all circumstances.
6. Returning a Windows 10 Device Manager Upgrade to its Previous State
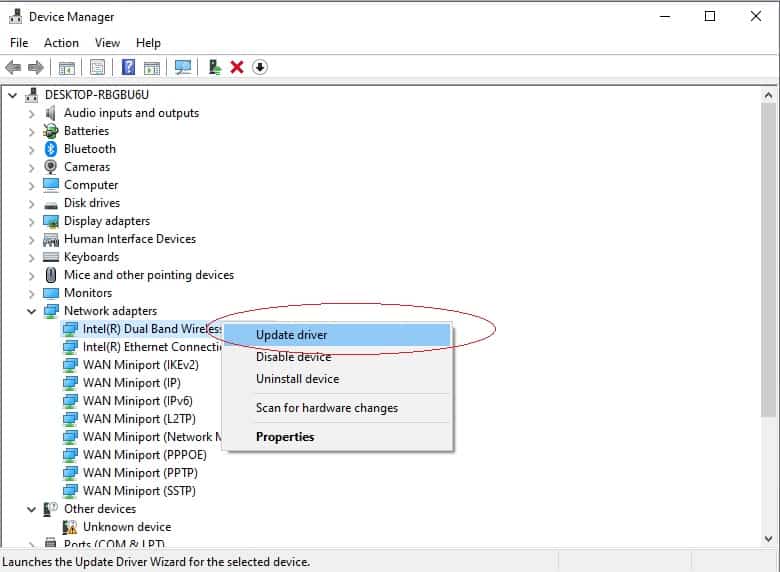
By selecting Update Driver from the Device Manager > |Network Adapters, you will be able to search the internet for any newly available updates. However, it’s unlikely that you’ll come across anything, which means you’ll have to manually download and install the most recent drivers from the manufacturer.
7. Using the Command Prompt, you can Reset the Network Setup
The Command Prompt window in Windows contains several network troubleshooting utilities. In many cases, a few simple commands can resolve your issue in a matter of seconds. Continue to the Start button to launch a Command Prompt (or PowerShell) with Administrator Capabilities if you are still experiencing difficulties.
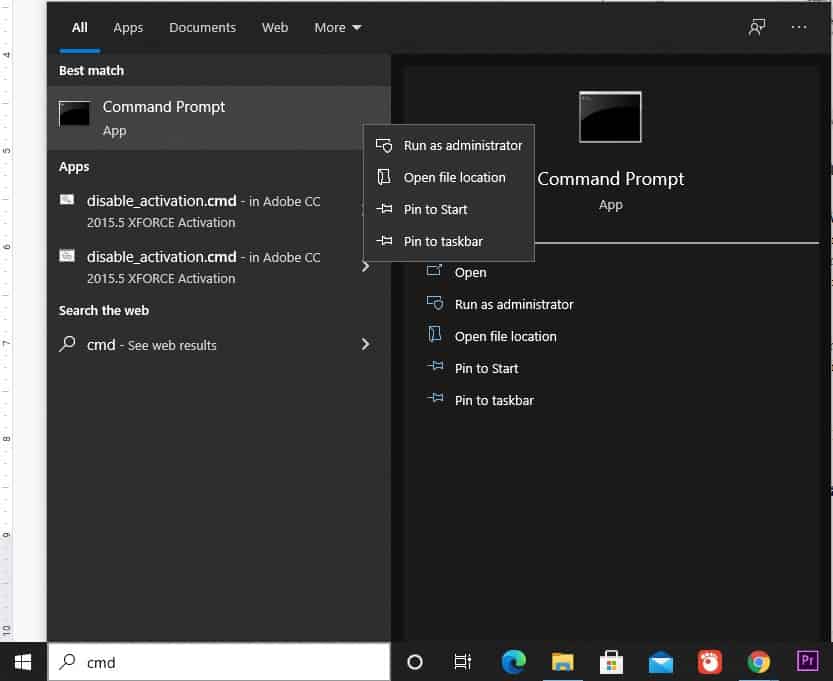
Execute the commands listed below one at a time, starting with steps.
- netsh winsock reset
- netsh int ip reset
- ipconfig /release
- ipconfig /renew
- ipconfig /flushdns
This service will completely reset the network settings on your computer, including wiping out all previous connection data and assigning your computer a new IP address from the router.
8. Examine the Firewall, Virtual Private Network (VPN), and Antivirus Software
Firewall configuration is a process that takes time.
- Examine your computer to determine if you have a firewall, virtual private network (VPN), or other security software that prohibits you from connecting to the Internet.
- The proxy settings may have changed without you realising it if you’ve just installed a new programme or updated your favourite piece of software.
- Remove your firewall, virtual private network (VPN), and antivirus software one at a time to check if the problem is resolved.
- This means that the issue is with one of the programs listed above. All of these devices must be configured in such a way that they do not interfere with the normal operation of the network.
9. Performing a Malware Scan is the Final Step in the Process
Certain spyware will modify your proxy settings regularly to prevent you from accessing the internet. At the end of each reboot, Windows shows the message, “Windows was unable to locate the proxy settings for this network.”
Because of this, it is highly recommended that you run an anti-malware scan with a reputable solution such as Bitdefender. Any malware that may be present on your computer will be detected and removed using this method.
If the scan reveals any infections, take the appropriate action and check to see if your connection has been restored to its previous functionality.

10. It’s a Good Idea to Create a Restore Point to Save Time
It is possible to restore your computer to a prior state in which it was operating properly by using the System Restore tool in Windows. If you’ve recently experienced difficulties, you should follow this general rule of thumb.
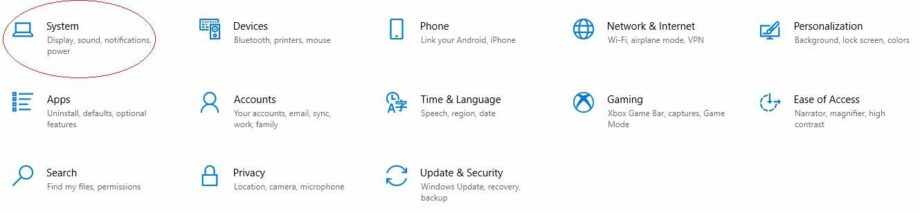
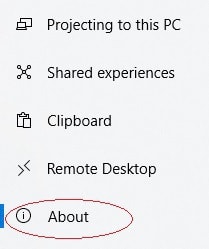
To get to it, go to Settings > System > About on your browser. If you don’t see System Protection on the right sidebar, you may need to expand the Settings window horizontally.
System Restore can be found on the System Protection tab of the resulting System Properties dialogue box, which opens a new tab in your browser. Windows takes care of both the selection of a restore point and the validation of the restoration operation.
You will be unable to use this feature if your computer does not have any backup restore points.
To proceed, Select a Restore Point and Press the Next button
All programs and drivers that have been installed since the restore point has been created will be removed when you restore to that point. By selecting Scan for affected programs, you can determine the ramifications of restoring from a previous point.
You will not lose any of your personnel files if you perform a System Restore on your computer.
11. Reset the Wireless Network Settings on your Computer
After exhausting all other options, resetting your network setup in Windows is the last choice to consider. Your Internet connection is being blocked by a “cannot detect proxy settings” error, and you have already spent a large amount of time attempting to remedy the problem.
With Windows 10, you can effortlessly restore your entire system to its factory settings. Select Network & Internet from the Settings drop-down menu. Restart your network by selecting it from the Status pane’s lower right-hand corner and clicking on it.
Keep in mind that doing so will completely wipe out all of your computer’s previously saved networks, requiring you to enter them all over again. Now is the time to click the Reset button if you agree with this policy change. Following the completion of the reset, your computer will restart.