Do you remember the days when you do drawings on the paint app in Windows? It was fun. Right? Well, paint is pretty old school now. In this era, we have many drawing tools available for windows, and not only for fun, but we can also do a lot of office and assignment work using those tools. Google drawing is one of the simplest and smoothest online web-based tools that you can use for drawing different shapes, flow charts, and basic diagrams. You can also add text and images.
Google drawings is a fundamental tool and don’t expect to get your building designed by this tool. We can say it is the simplest version of Windows Visio. But you are not here to learn the advanced drawings, right? Let’s have a look at the procedure use the Google Drawings. In this article, we will look into the following:
- Google Drawing Basics
- How to Create Google Drawings
- A Simple Drawing Using Google Drawings
- How to Use Diagrams in Google Drawings
1. Google Drawing Basics
First of all, you have to log in to your Google account. It is better to turn on the browser synchronization using your Google account; in this way, your drawings will get automatically saved in your Google drive.
- Go to Google drawings. A new drawing page will open.
- You can also access the Google drawings from Google drive or Google docs. This is how you can access the Google drawings from Google Drive or Google Docs.
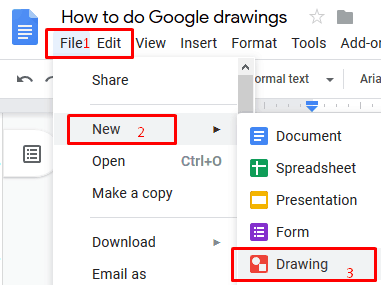
- Click on the top right File button, click on New and then click on Drawings as shown in the screenshot below.
Select Drawing - You can also open the existing Google drawing from the google drive anytime.
- There is no Mobile app for Google drawings available right now, but you can see your drawings in the Google Doc app, but you can’t edit them. You can share, download or print your Google drawings from your Android or iOS device.
2. How to Create Google Drawings
As mentioned earlier, you can draw the basic drawings using drawing Google. Here are the tools you can use to draw google drawings.
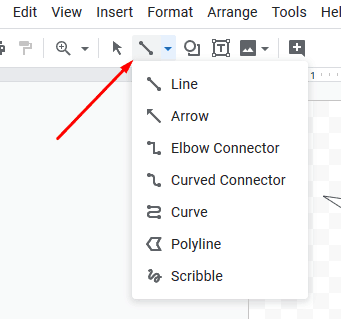
- Line Tools: The first tool you will see in the Google drawings is the line tool. Use this tool to draw different shapes, curves and icons. You have to select the desired line tool shape and drag that on the canvas to illustrate that. You will learn with time.
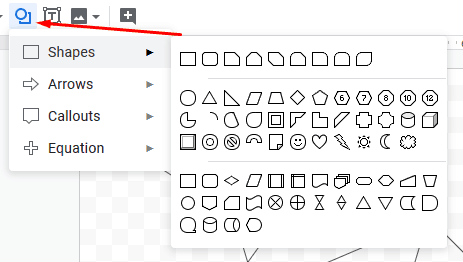
Select Line Tool - Shapes: The next tool you will see is the shapes tool. When you click on the shape, you will see several options like shapes, arrows, callouts, and equations. You can hover on the desired options to get the shapes. Click on the shape you want to draw and drag the mouse to change the size of that shape.
Select Shapes - Text Box: on the next to shape tools, you can see the text box button. Click on that and then click on the place on the canvas where you want to add the text.
- Images: You can also add custom images in Google drawings and then you can use them with drawings by Google. You can pick pictures from Google, drive, computer and even by the camera.
3. A Simple Drawing Using Google Drawings
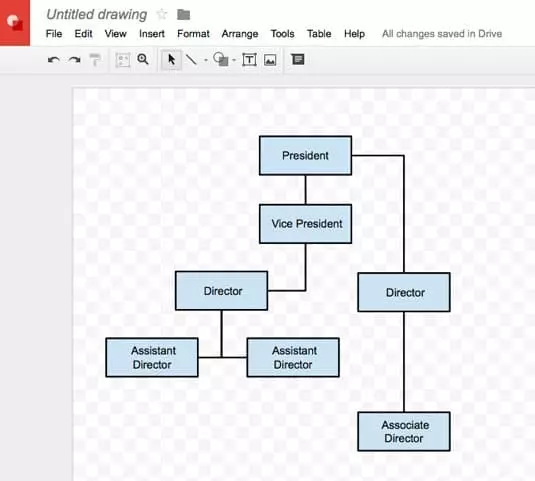
We used three tools in the above diagram. First of all, we used the shape tool to draw the rectangular shapes and then text tools to add text in them. We used the lines tools to connect the shapes to give it a shape of flow chart.
4. How to Use Diagrams in Google Drawings
Diagrams are really useful in expressing your ideas and delivering your message. Most of the time, we use whiteboards to draw diagrams and represent the idea. Don’t you think that it is pretty old school method? In this digital world, you can use computers and software to do such a task. And Google drawing gives you this opportunity without being an expert in graphic designing. Here is a simple method to use diagrams in Google drawings.
- Open Google Drawings: You can open Google drawings using Google Drive or Google docs on the web.
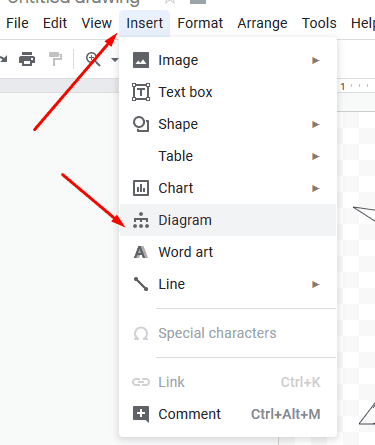
- Select the Diagram: To select the diagram from the collections of the diagrams in Google drawings, click on Insert on the top left corner of the web page. Now in the menu, you will see Diagrams option.
Select Diagram
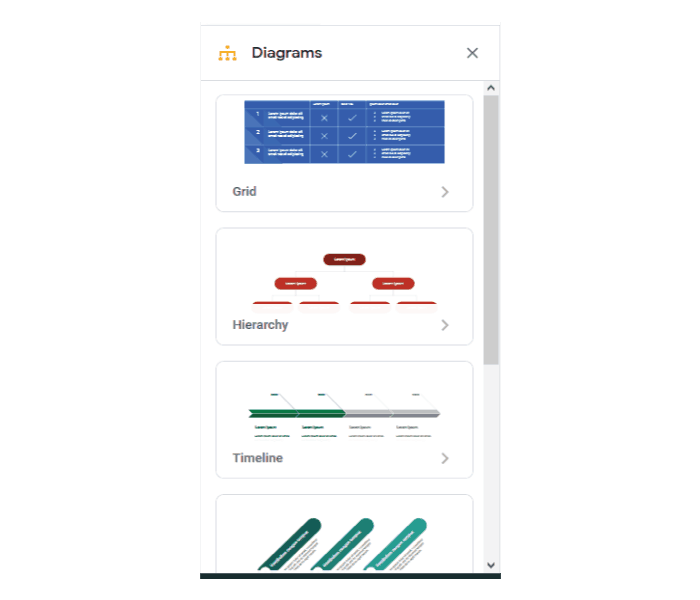
A new menu will open on the right of the page with all the available diagram types.
- Grid
- Hierarchy
- Timeline
- Process
- Relationship
- Cycle
Now select one of the diagram types.
Now you will see options for selecting the size of the diagram and color for the diagram. Select the required one.
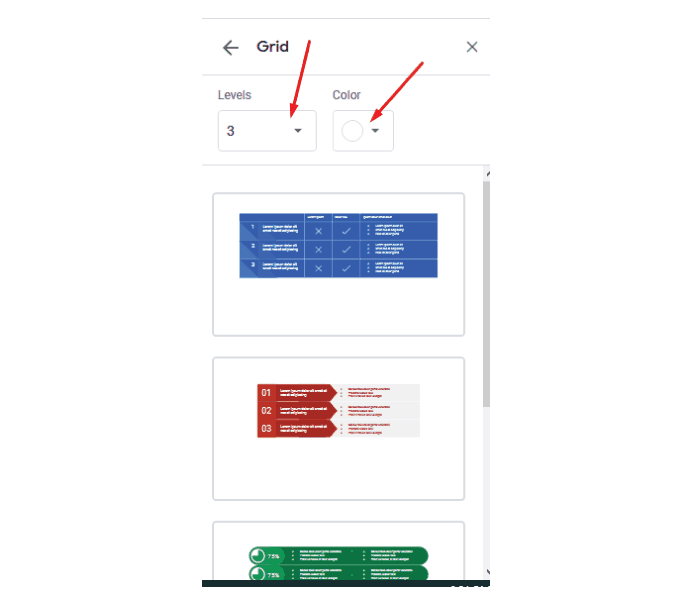
After selecting the desired number of sets for your diagram and color, you can start to write in the boxes to make the diagram. Diagram will be auto-saved in Google drive. However, you can download it too in Pdf, jpg, png, and other formats. To download, click on the File button and then Download.
Conclusion
Now it’s your turn to show your creativity. Open the Google draw and then start drawing the diagrams and drawings for your office or academical needs. If you have any questions about this tutorial, you can ask in the comments section.

