DWM.exe’s high CPU might cause Windows 10 to run slowly. You must address this issue before it becomes unsolvable.
1. Outdated Drivers
First, check the driver to see if a CPU is used to process the visual effects. The graphic driver is responsible for distributing the usage burden, and it has to make sure that the CPU does not have to process much of the visual effect when there is a dedicated Graphics Card for that purpose.
There are two ways to check and update the graphic driver on your PC. You can either do it manually or use Driver Booster to check and update the driver automatically. In the first part, TechNinjaPro will show you the manual method. Follow the steps to update your driver.
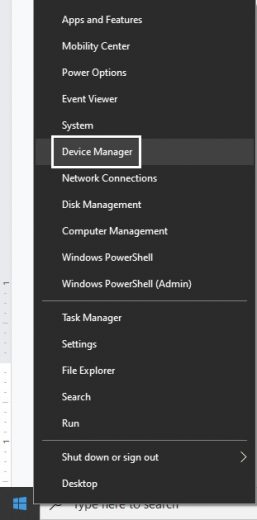
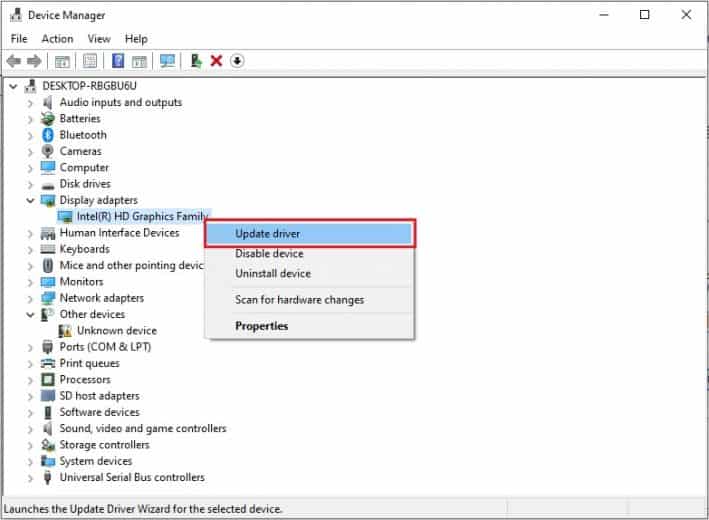
- Right-click on the Start button on your Windows 10 and select Device Manager from the list.

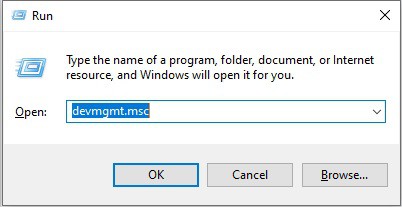
- If you cannot find the Device Manager in the list, you can try pressing Windows + R and type devmgmt.msc in the Run window.

- Under Display Adapters, right-click on Intel(R) HD Graphics and select Update Driver.

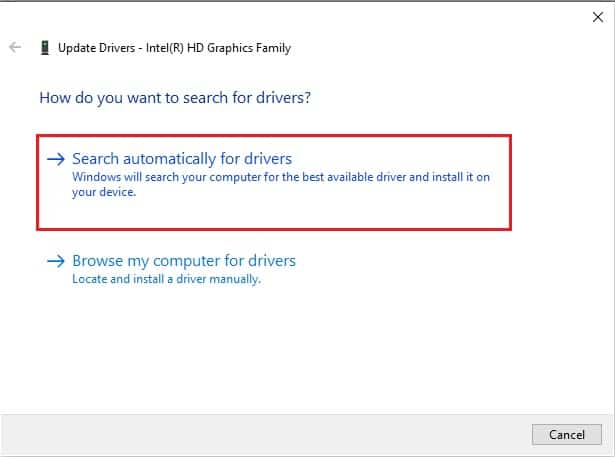
- On the Update Driver window, It will give you two options. Firstly, it finds & installs the new driver online automatically, and in the second Option, you can do that manually.

- Pick any one of these and install the Driver.
- After this, restart your computer. And check if the issue is resolved.
Update Driver automatically using Driver Booster.
Driver Booster will update the driver and check and solve other issues with it as well. Follow the steps given below:
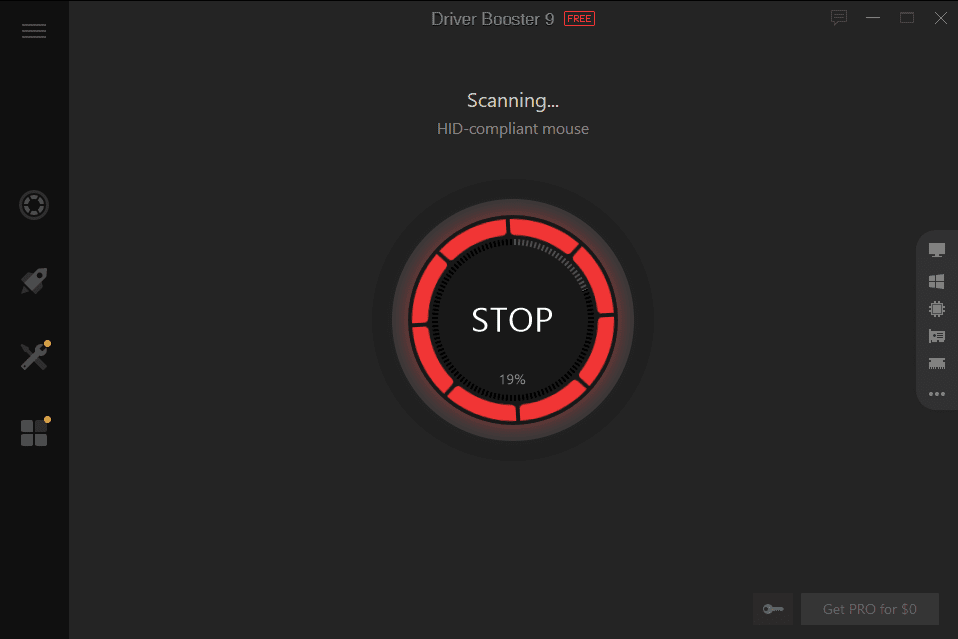
- Driver Booster is a program that can simply download, install, and run on your computer.
- On the Driver Booster window, click Scan.

- Once the scan is complete, it will show you all outdated drivers that need to be updated.

- Tap on Update Now. If you want only to update the Graphic driver, look it up in the list and hit Update
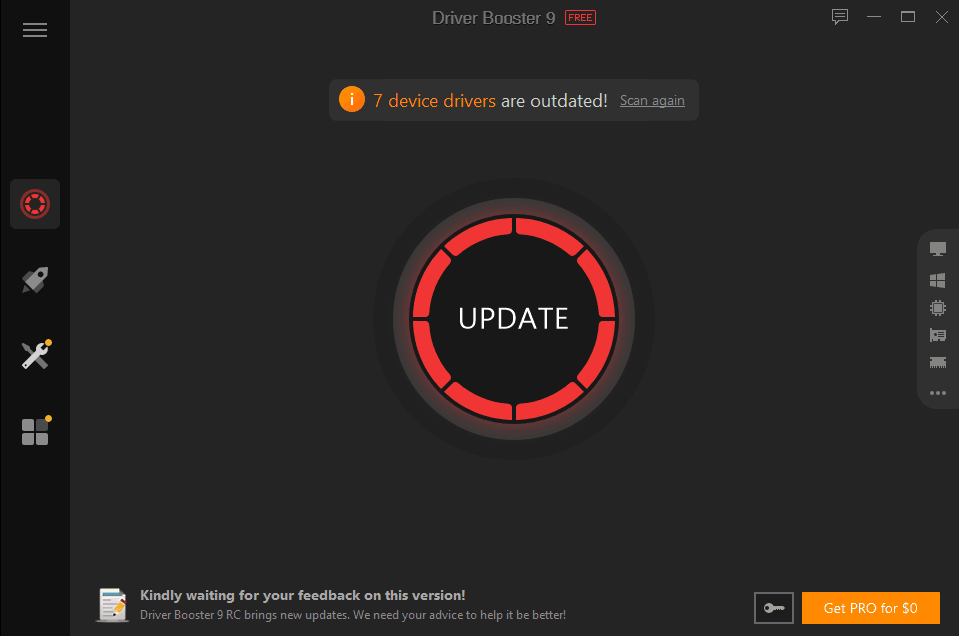
Driver Booster will download all the outdated drivers for your windows 10. It will download the updated driver of any company, either Inter or AMD’s driver.
Once the latest driver is downloaded, restart your computer and check the performance of the CPU. Desktop Window Manager using High CPU power issue will be resolved. (Read complete Review of Driver Booster PRO)
2. Change Theme and Wallpaper
If the issues persist, change the theme and wallpaper of the computer. As discussed earlier, Desktop Window Manager deals with the visual effects on the desktop. Try to change some relevant settings that may solve the issue.
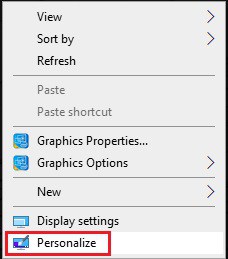
- Choose Personalize from the drop-down menu when you right-click your desktop.

- Select Theme from the left pane, and then apply a theme to your computer.

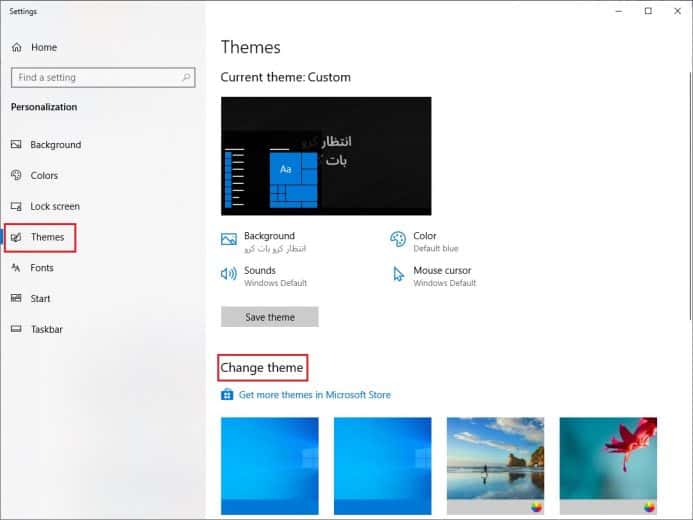
This also gives the option to customize everything individually like Background, Colors, Lock screen, and Taskbar. Once you are done with customization, click the Personalize Settings and check Task Manager. It will most probably solve the DWM.exe issue, and if it does not, keep looking for solutions below.
3. Adjust for Best Performance
There is another option for dealing with the performance issues produced by DWM.exe. This Option is associated with the performance option. By changing the performance parameter, you can reduce the burden on the CPU.
Follow the steps to make changes to the performance settings of your computer.
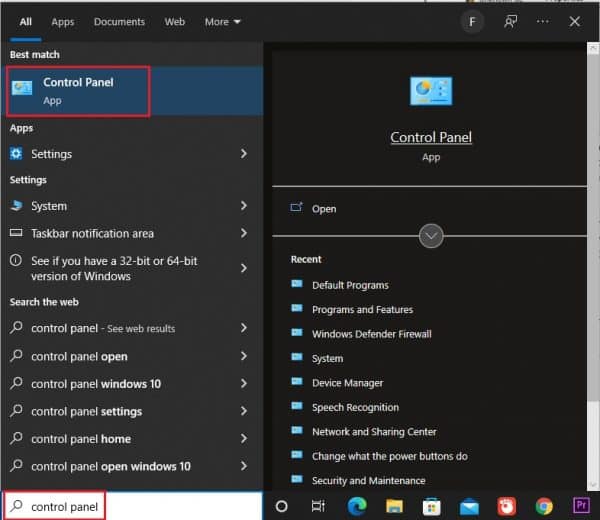
- Open the Control Panel from the Start menu.

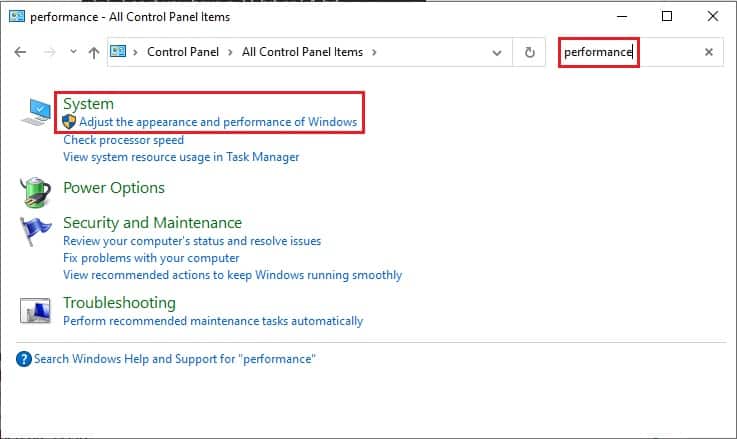
- In the control panel window, search for the Performance option.
- Then Click on Adjust the appearance and performance of Windows under the System.

- Select Adjust for optimal performance under Virtual Effects in Performance window. Then press OK.

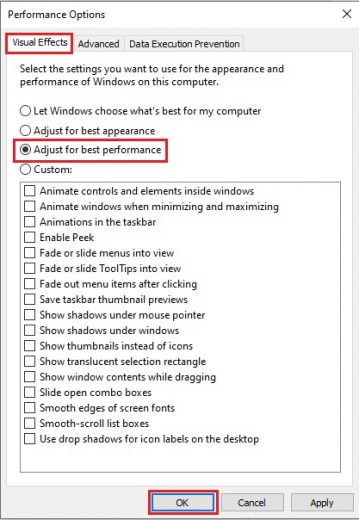
After this, the high CPU power consumption in the task manager caused by Desktop Window Manager will not cause Windows 10 to slow down.
4. Check DWM.exe CPU Usage in Real-Time
There could be a particular application that makes Desktop Window Manager consume high CPU power. Monitoring the function DWM.exe is essential as that can help point out the reason behind the excessive use of CPU power.
To assist you in this matter, Advanced SystemCare is the best software, and it will keep an eye on the Desktop Window Manager and let you know when it starts to heat the computer.
- Get Advanced SystemCare, install it, and run it.
- At the right bottom of the Desktop, right-click the launched Advanced SystemCare program icon to open the Performance Monitor.
- Locate Performance Monitor on the desktop, then click the arrow symbol to maximize Performance Monitor.
- In Maximized Performance Monitor, identify CPU and then click the Speed up icon to free up CPU.
Advanced SystemCare would have taken care of the CPU performance issue at the end of the procedure. It would help to eliminate all the applications running in the background that have no use to you. (Read complete Review of Advanced SystemCare PRO)
5. Troubleshoot Windows
Troubleshooting is another possible solution that can help you solve the CPU performance issue. Troubleshooting can find the reason behind it and also solve it. Follow the given steps to troubleshoot the Window.
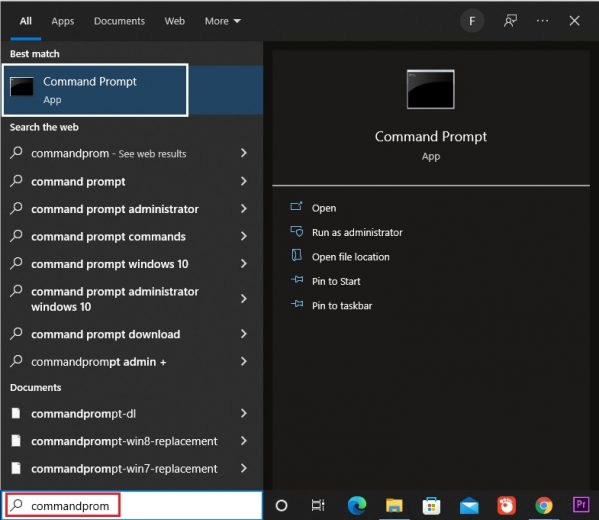
- Open Command Prompt from the Start menu.

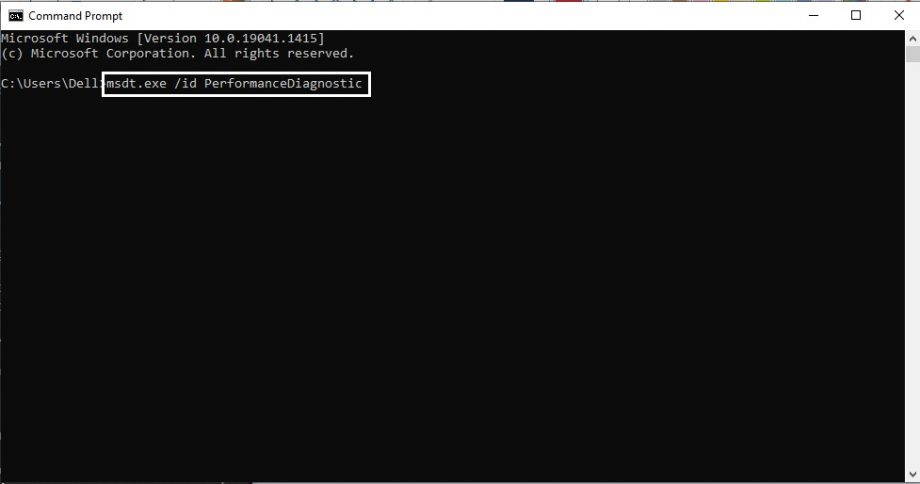
- Type the command given below in the Command Prompt and hit Enter.

msdt.exe /id PerformanceDiagnostic - The Window for Performance would appear. To continue troubleshooting performance, click Next.
If windows find any error, it will let you know. You can click on Fix the issue to resolve it. After this check, the high CPU in Desktop Window Manager will vanish from your computer.
6. Scan for Virus
The malware in your system could also cause an increase in CPU power consumption. An Executable file can be used for hacking purposes, and creating an executive file similar to DWM.exe would not be a big issue for cybercriminals. You must make sure that the executive file running in the background of your pc is not malware.
One of the best options that are available on the Windows computer is the Microsoft-owned Windows Defender. It is advised to Scan your PC with the Windows Security for viruses, and Windows Defender comes built-in with Windows 10.
Follow the steps for a complete scan of your computer.
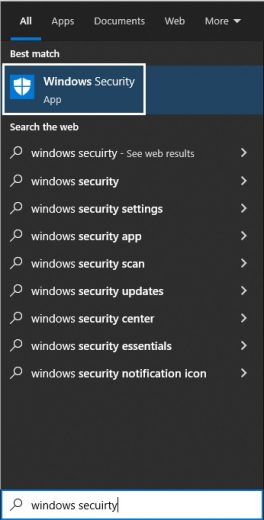
- Search Windows Defender in the Start menu, and hit Enter.

- In Windows Defender, select Virus & threat protection.

- On the next Window, go for a Quick Scan.
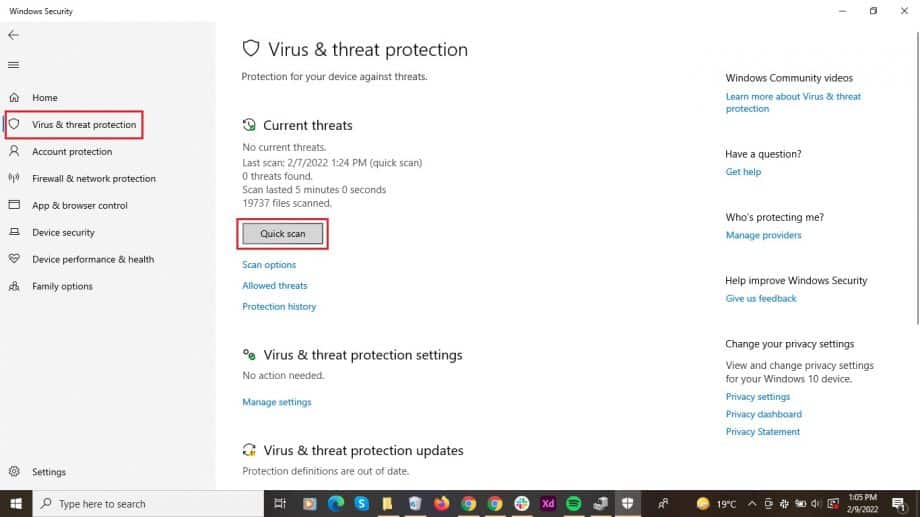
After completing Scan, Windows Defender will let you know if it finds any virus linked to the applications in your computer.
7. Disabling Hardware Acceleration for Office Products
Disabling the hardware acceleration for Microsoft Office applications installed on your computer is another option that works well for many people. The use of computer hardware to accomplish some functions more effectively than the software solution is known as hardware acceleration.
Follow the method to Disable Hardware Acceleration for Office products to increase the speed of the CPU.
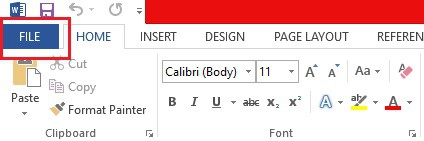
- Open any blank page in any Office product and select File from the top left-hand menu. (images are of Microsoft Office Word)

- Select Option from the menu. (images are of Microsoft Office Word)

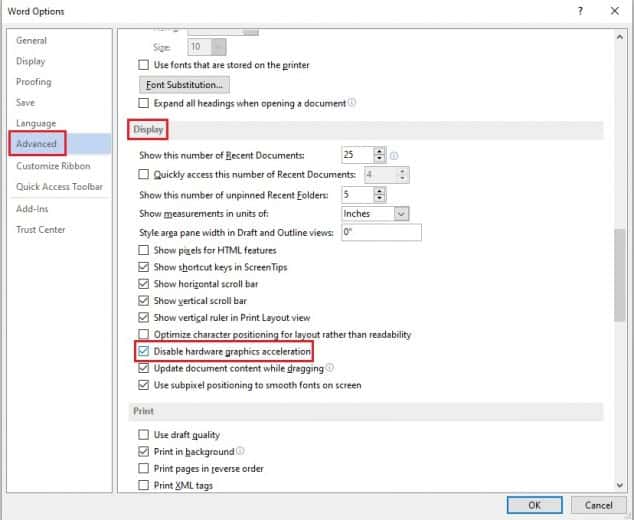
- Select Advanced from the drop-down menu, scroll through the items until you find Display, and then select Disable Hardware Graphics Acceleration from the drop-down menu. Click Apply to save your changes and exit. (images are of Microsoft Office Word)

- To let the changes take effect, restart your computer

Once you are back on your Windows 10 desktop, check if the issue with Desktop Windows Manager is still consuming high CPU power or not.
8. Change default app setting
In recent years, the craze of dark mode has touched the sky. And all the operating systems from mobile to computer started to introduce this feature. Microsoft introduced this feature to Windows in the fall of 2017.
After this update, Light and Dark are the two settings available to you. The setting is set to Light by default. If you switched to dark mode, you should be aware that one of the causes of the high CPU consumption under consideration is dark mode.
It is suggested that if it starts to heat up, you should switch back to light mode to cool down the CPU. Follow the steps to do that.
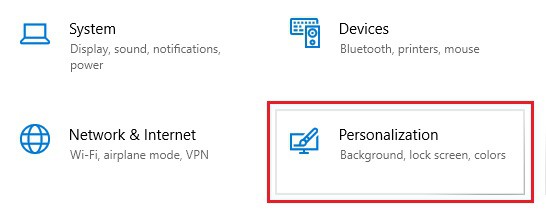
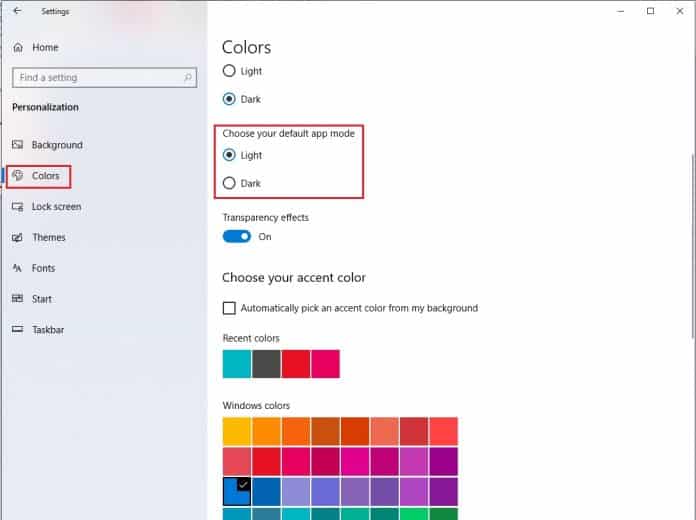
- Open system’s Settings from the Start of Windows 10.

- Navigate to Personalization in the Settings.

- Click on Colors on the personalization page.
- Click on Choose your default app mode at the bottom of the colors page.

- Choose Light from the drop-down menu.

In the end, Restart your computer and keep an eye on the CPU utilization. It is expected that the issue will be resolved.